• Skip to primary navigation
  • Skip to main content
  • Skip to primary sidebar
amberitas kitchen
  • recipes
    • sandwiches
    • sauces
    • lunch
    • dinner
    • mexican
    • pasta
    • potato
    • dessert
    • veganuary
  • English
    • Español
    • Nederlands
    • English
  • contact
  • about me
  • privacy policy
  • Navigation Menu: Social Icons

One Pan BBQ-Sage Jackfruit

24/11/2020 by Amber Leave a Comment

One pan BBQ-sage jackfruit is easy to make and, more importantly, delicious! Read on to see the instructions and grab the recipe.

three buns with one pan bbq sage jackfruit on a wooden serving plank and parchment paper seen from the front

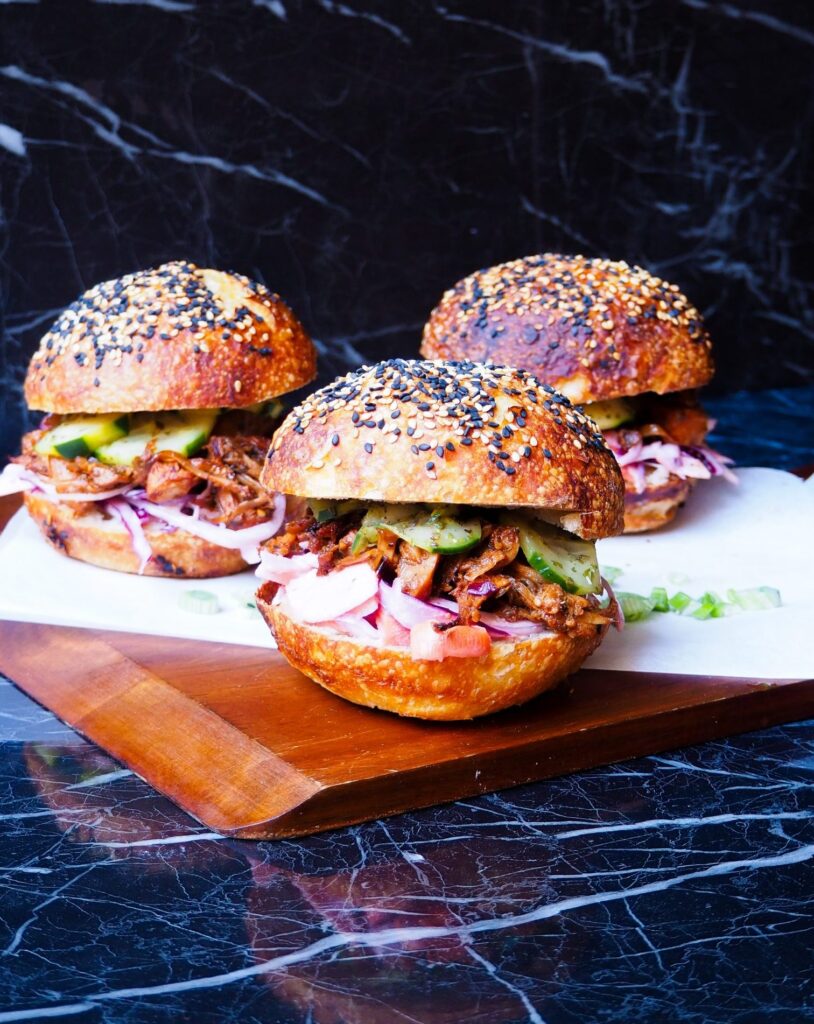
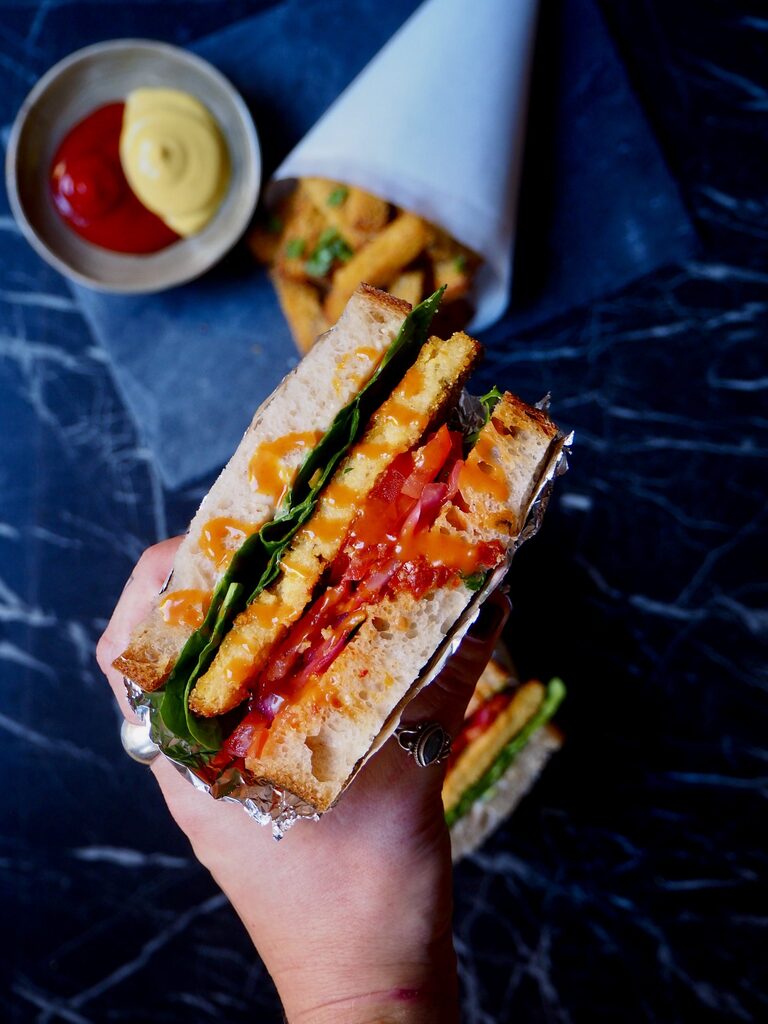
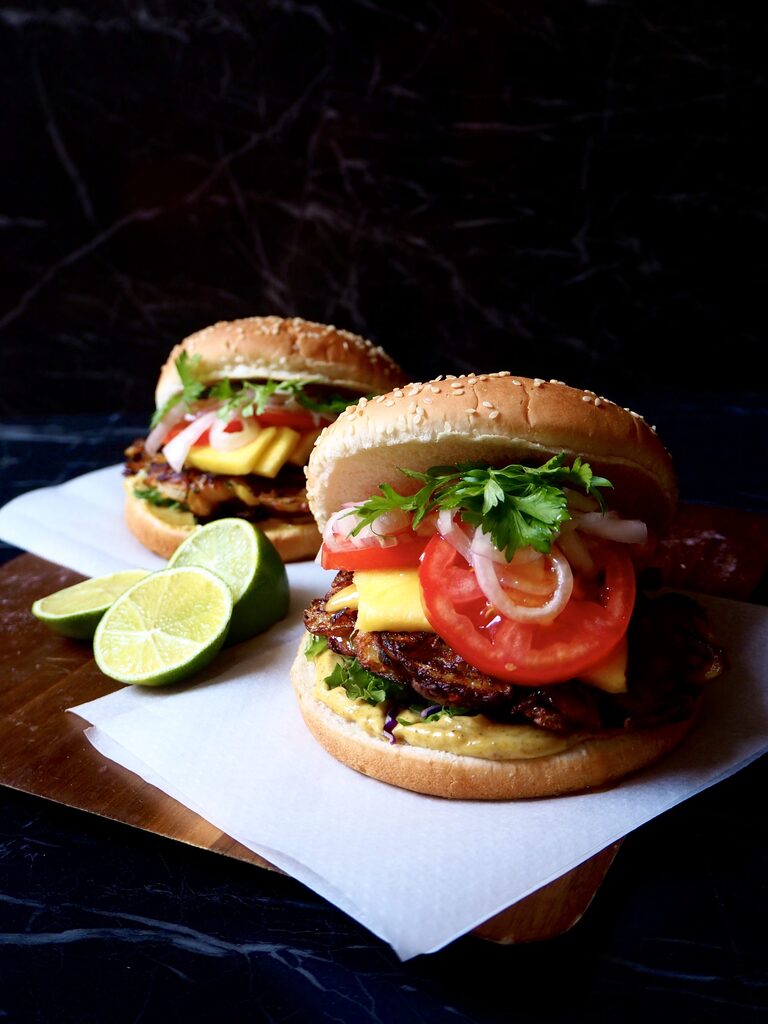
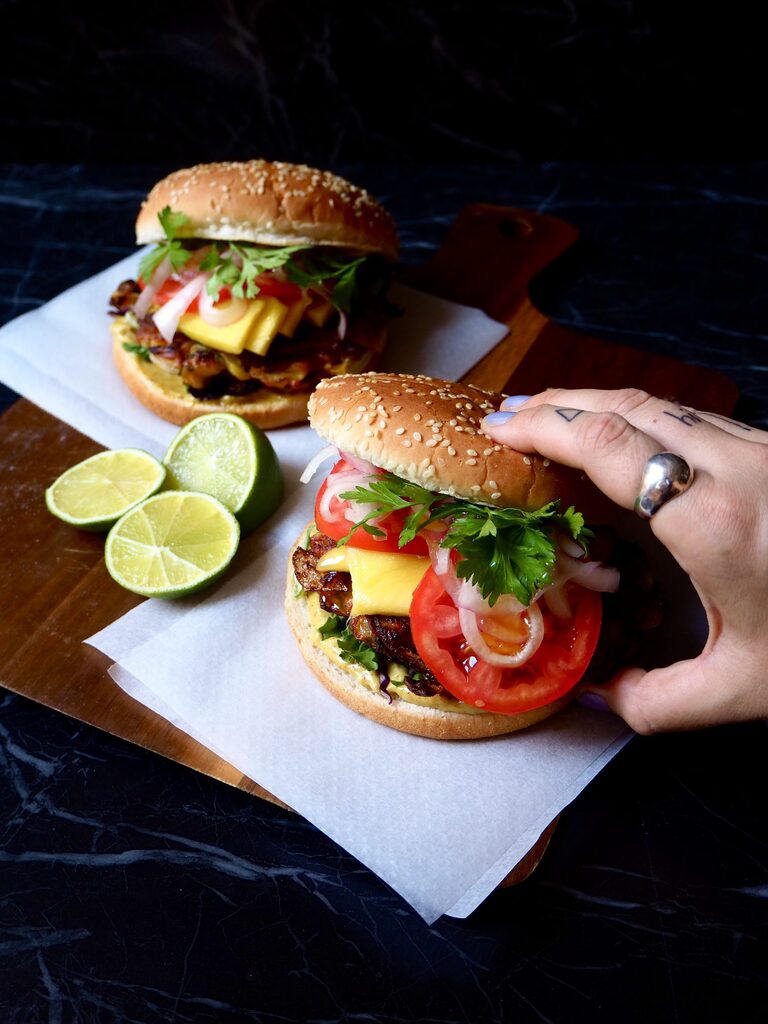
Tip on how to serve the One Pan BBQ Sage jackfruit; on a bun!

Jackfruit

For these types of savoury recipes, make sure you buy young jackfruit in water. I have made the mistake before of buying in syrup and that will not work. Here’s a reference of what you’re looking for: young green jackfruit tin. They now sell jackfruit at loads of supermarkets, otherwise have a look in the Asian shop. I buy mine there for €1.45 a tin.

A few small steps need to be taken before we can prepare the jackfruit. First, let’s drain and rinse. Then, cutting out the harder ends of the bits of jackfruit that have a triangle shape. You’ll know what I mean when you get your hands on it. The jackfruit is cut in triangle shapes. The part of those triangles that’s easy to pull apart, and softer to the touch, those we’ll cook and eat. The ends, the smaller triangles, we’ll cut those off. You can still eat those or cook them along, just make sure you chop them finely. Or blitz in the food processor.

jackfruit in a colander seen from above

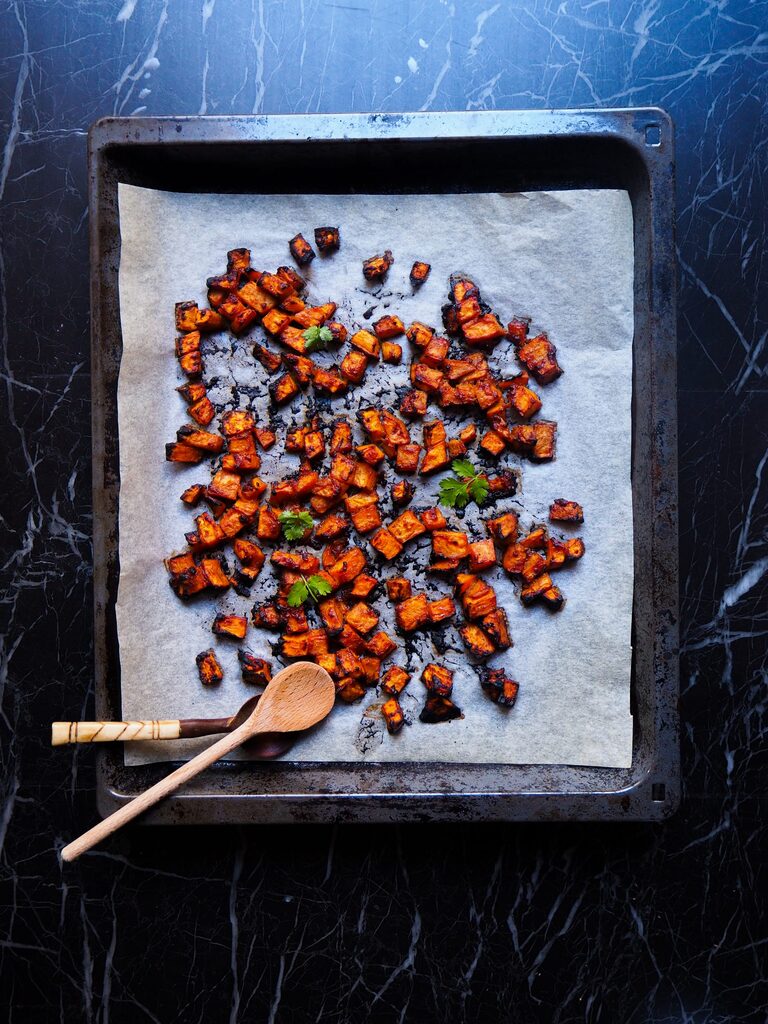
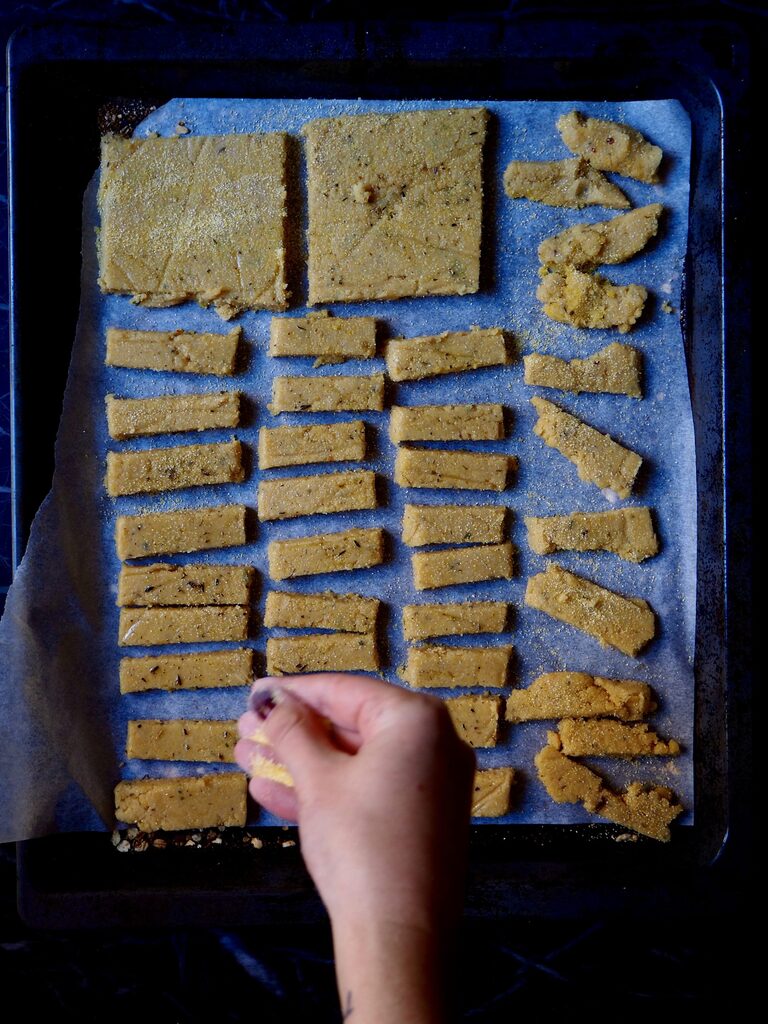
The jackfruit ready to pop onto the oven tray.

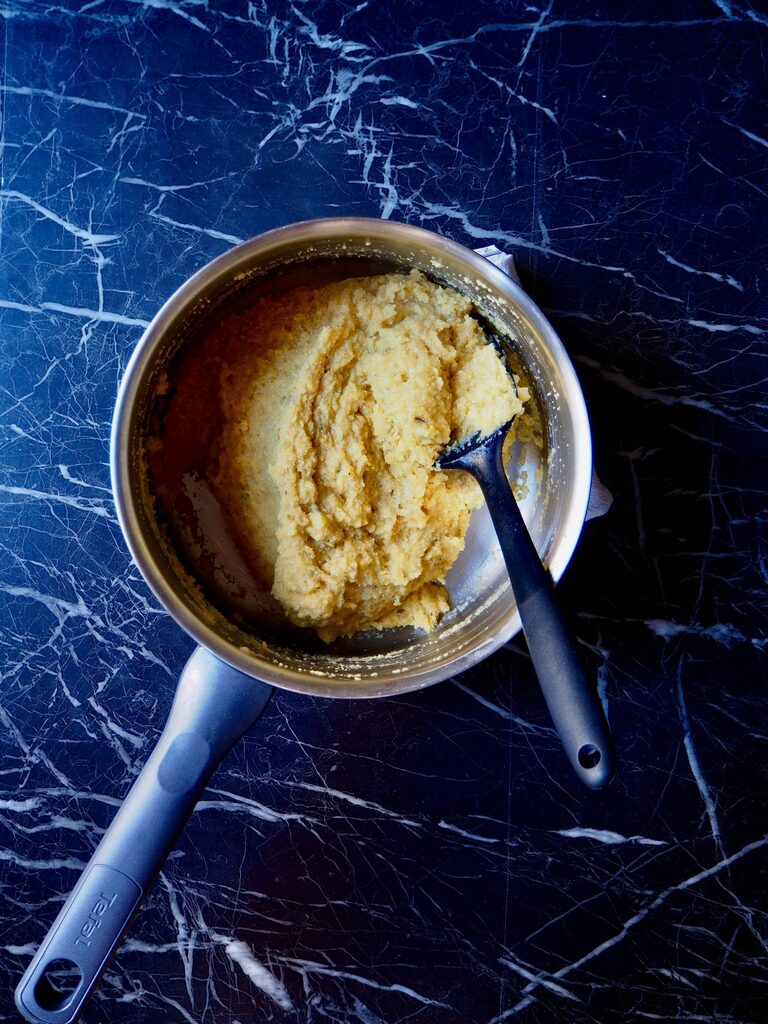
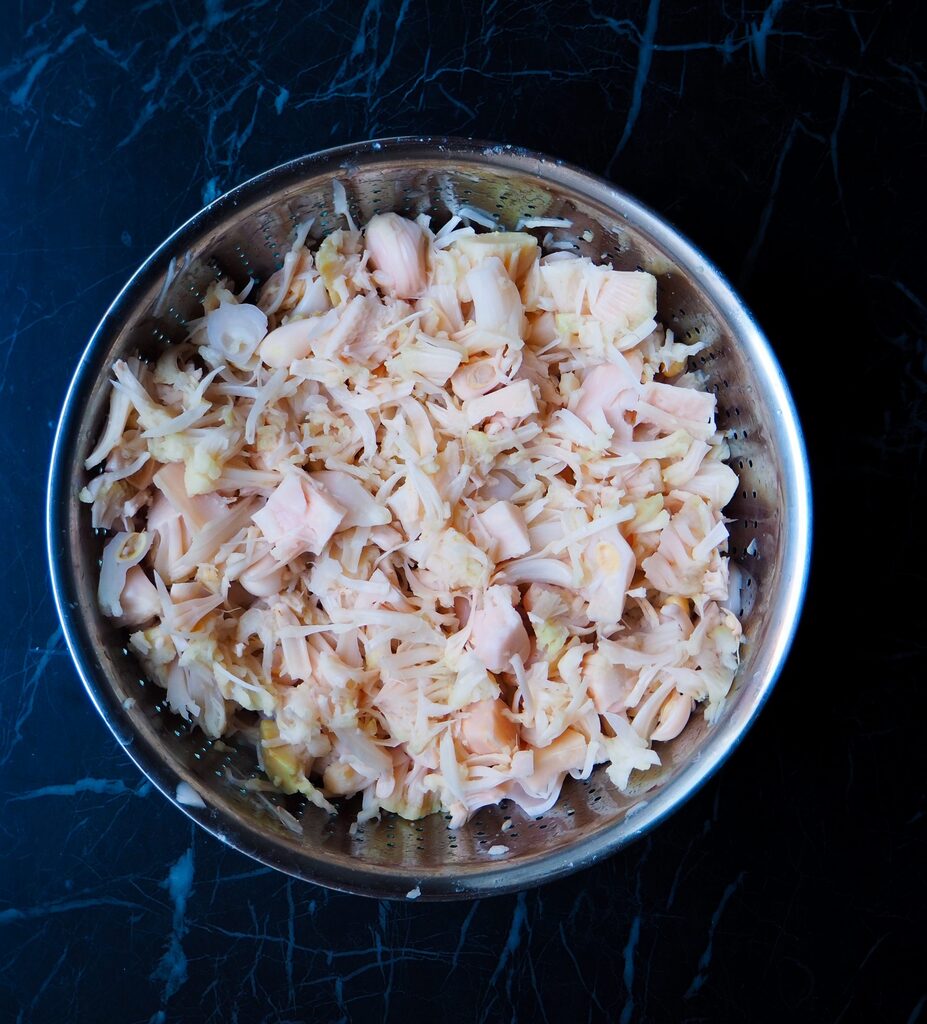
Second, with your hands or a fork or potato masher, get the bits of jackfruit loosened and press out some of the water. I like to do this in a colander.

jackfruit, onion, and garlic, with bbq glaze and sage being sprinkled by a left hand on an oven tray seen from above

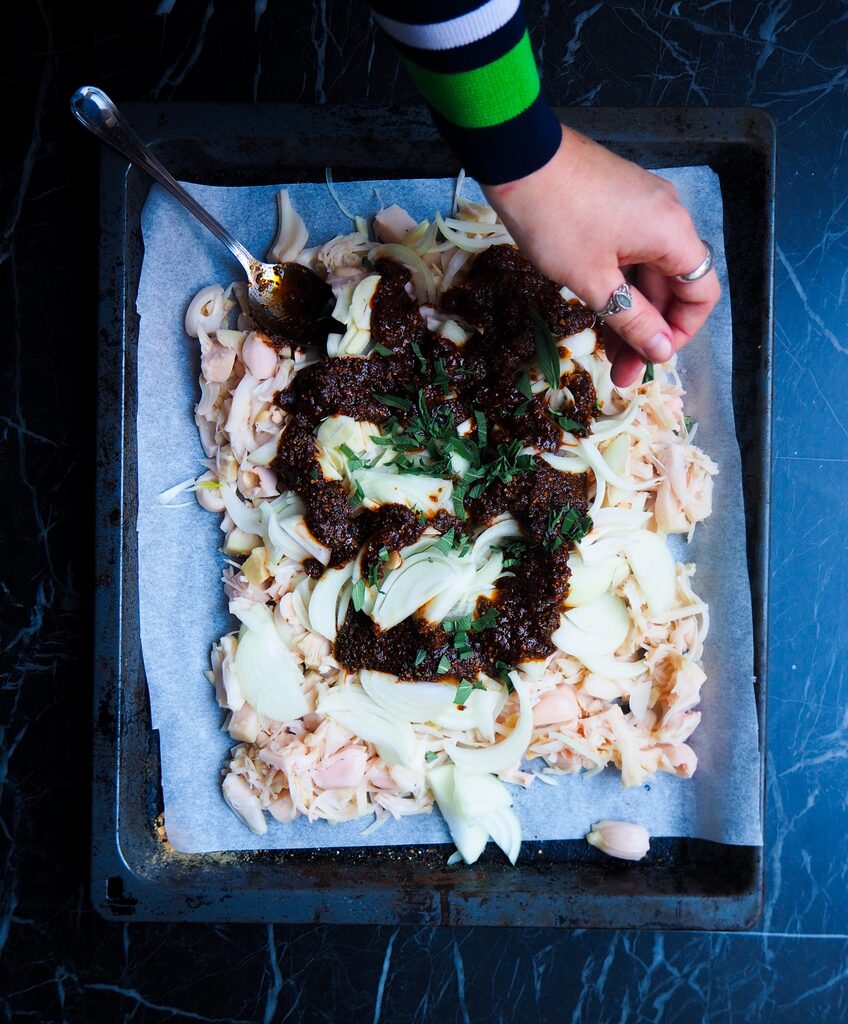
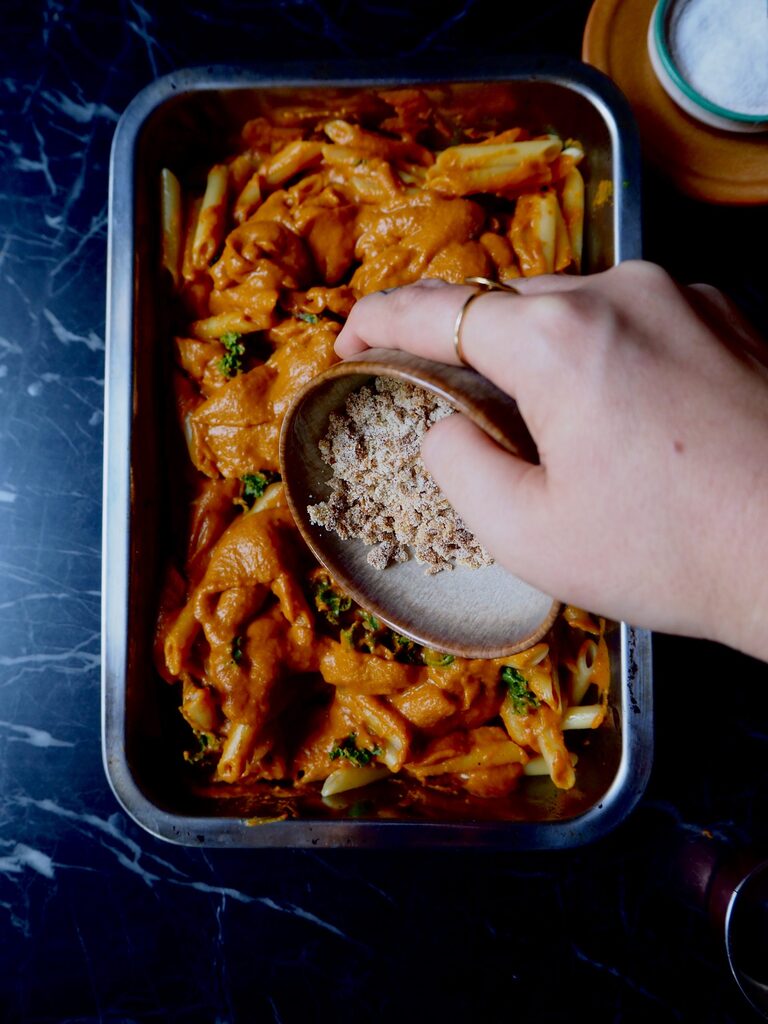
The extra added flavour: sage!

Now, it’s ready to get onto the baking tray. Let’s chop up an onion and some garlic as well.

Getting that BBQ Flavour

Of course, you could just get barbecue sauce and use that. By all means, please do so! But if you know me, you know I like to make things from scratch. And no worries, we won’t be making sauce. We’ll make a marinade that will evoke that BBQ flavour.
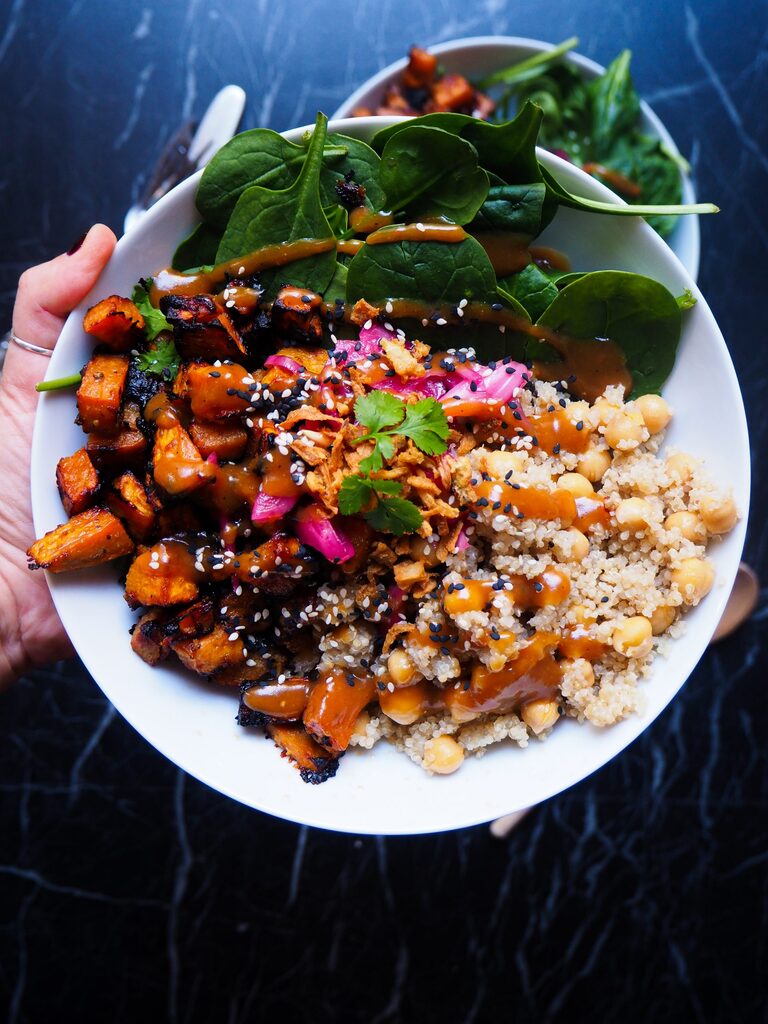
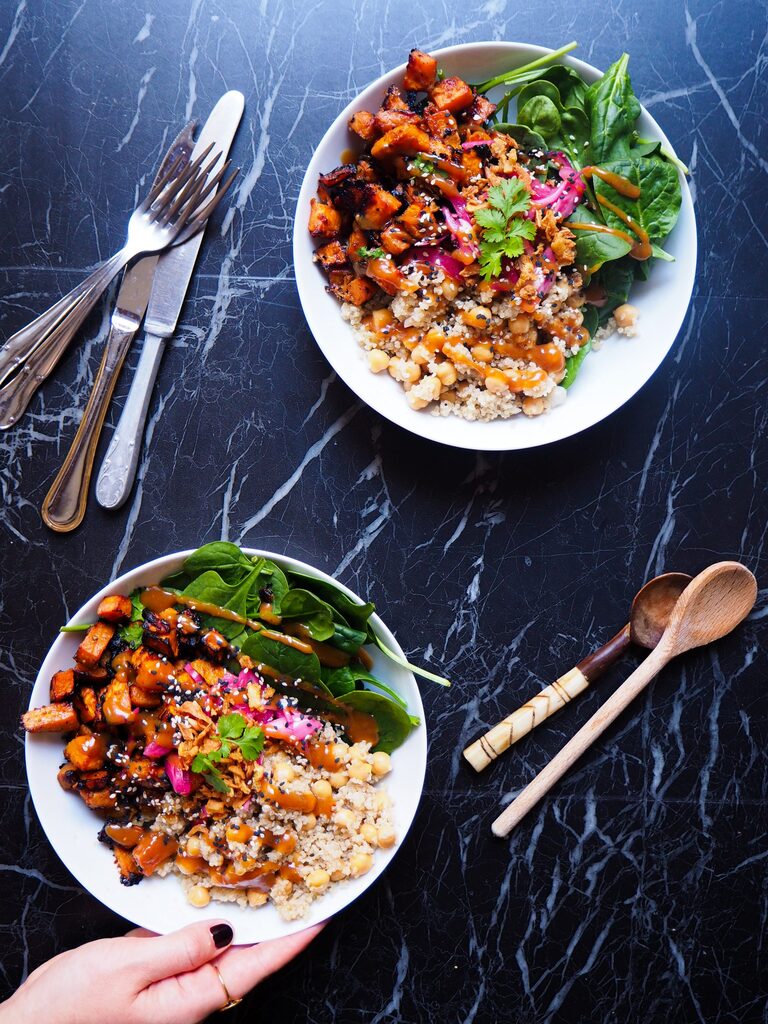
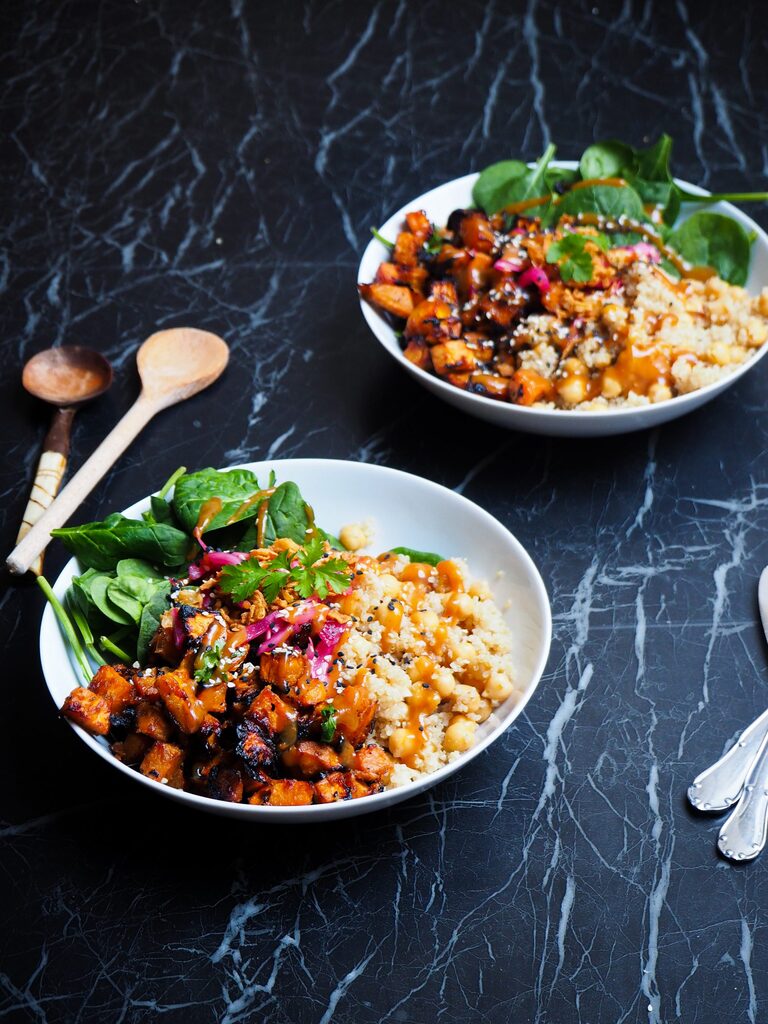
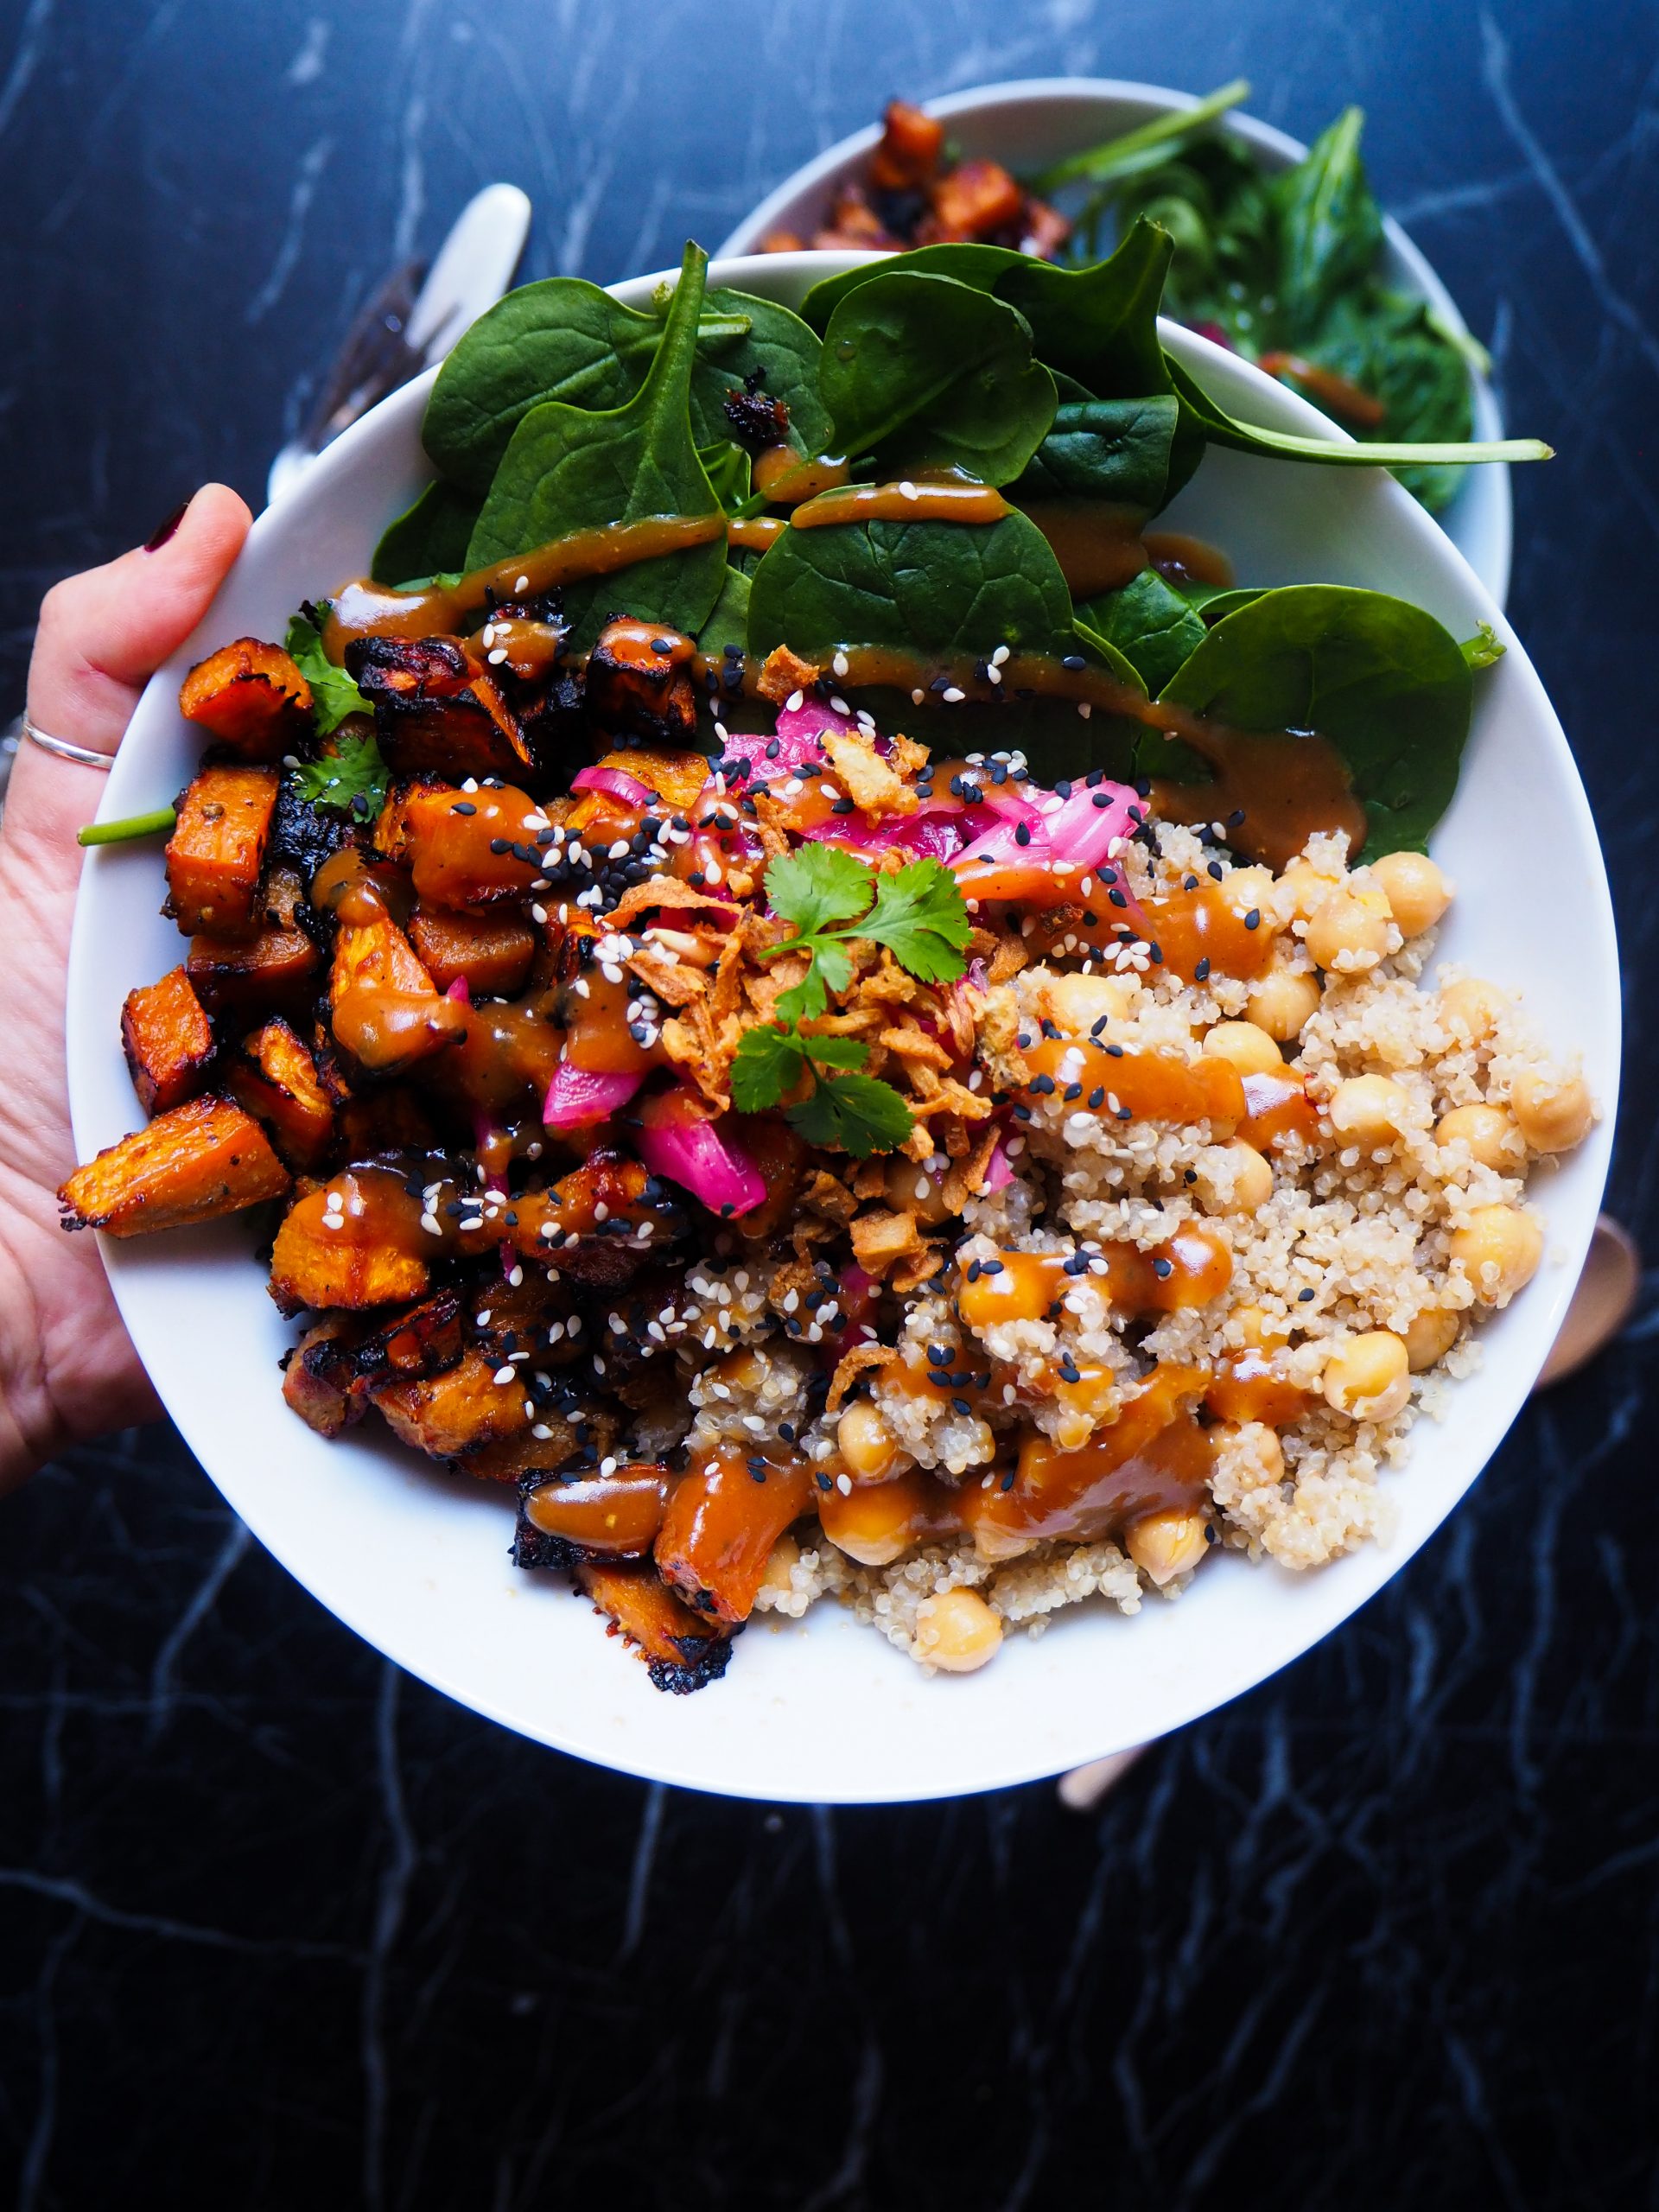
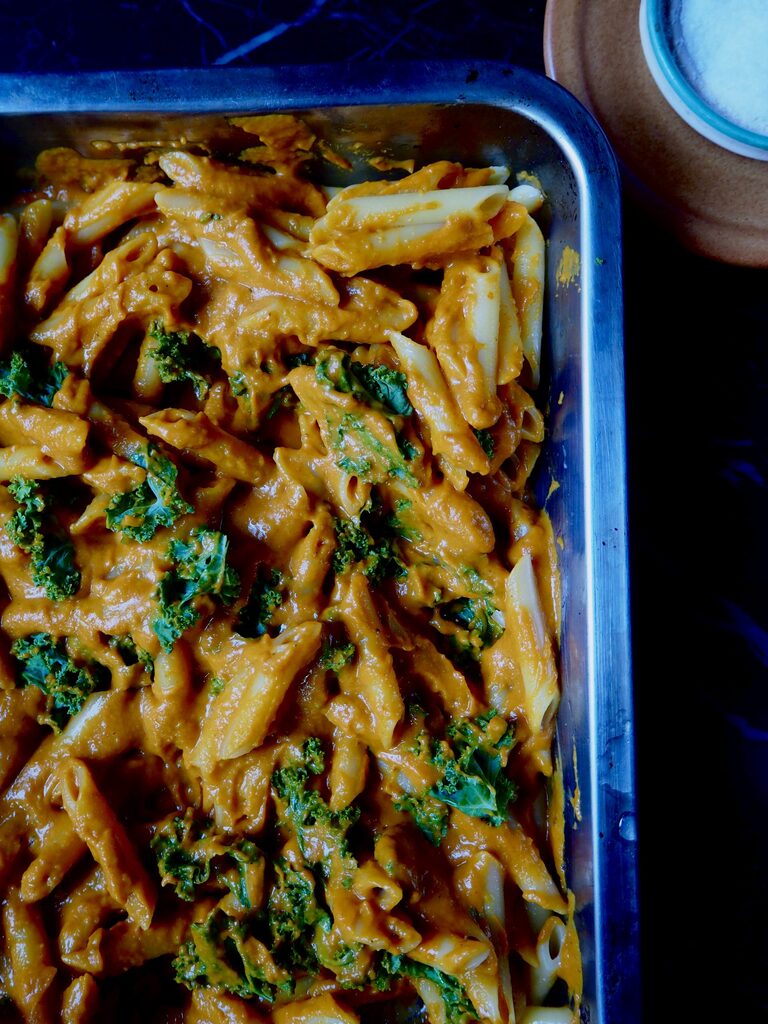
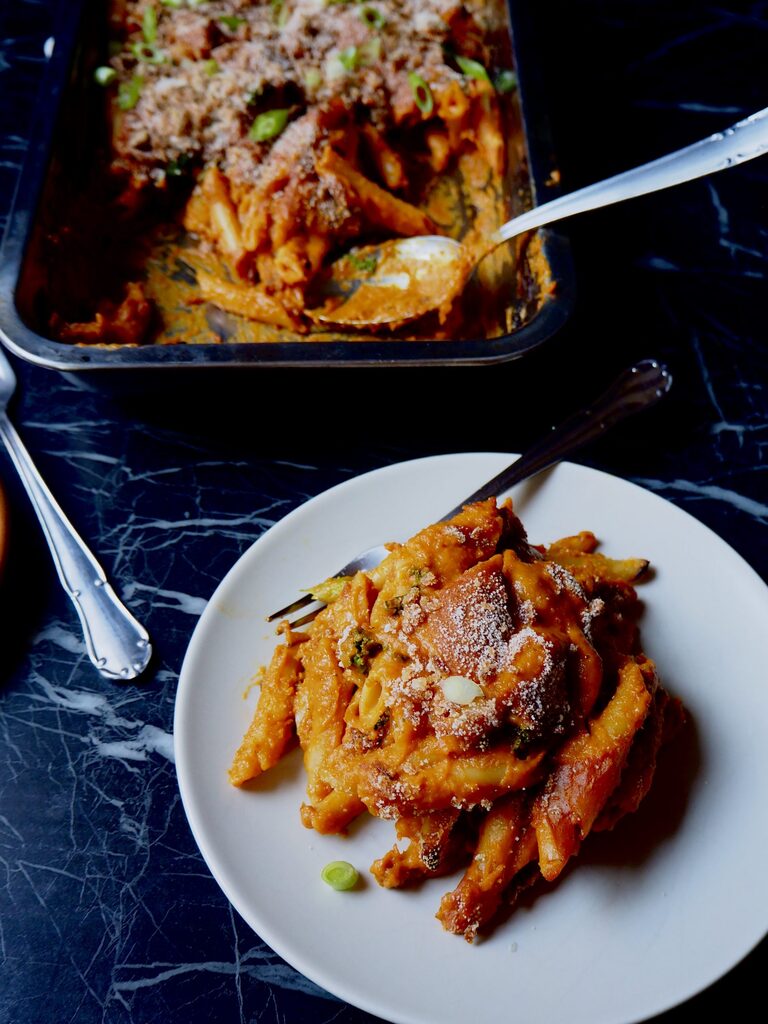
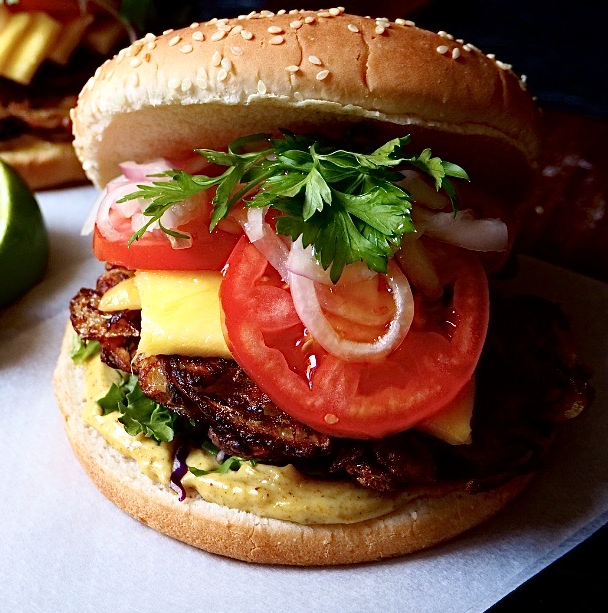
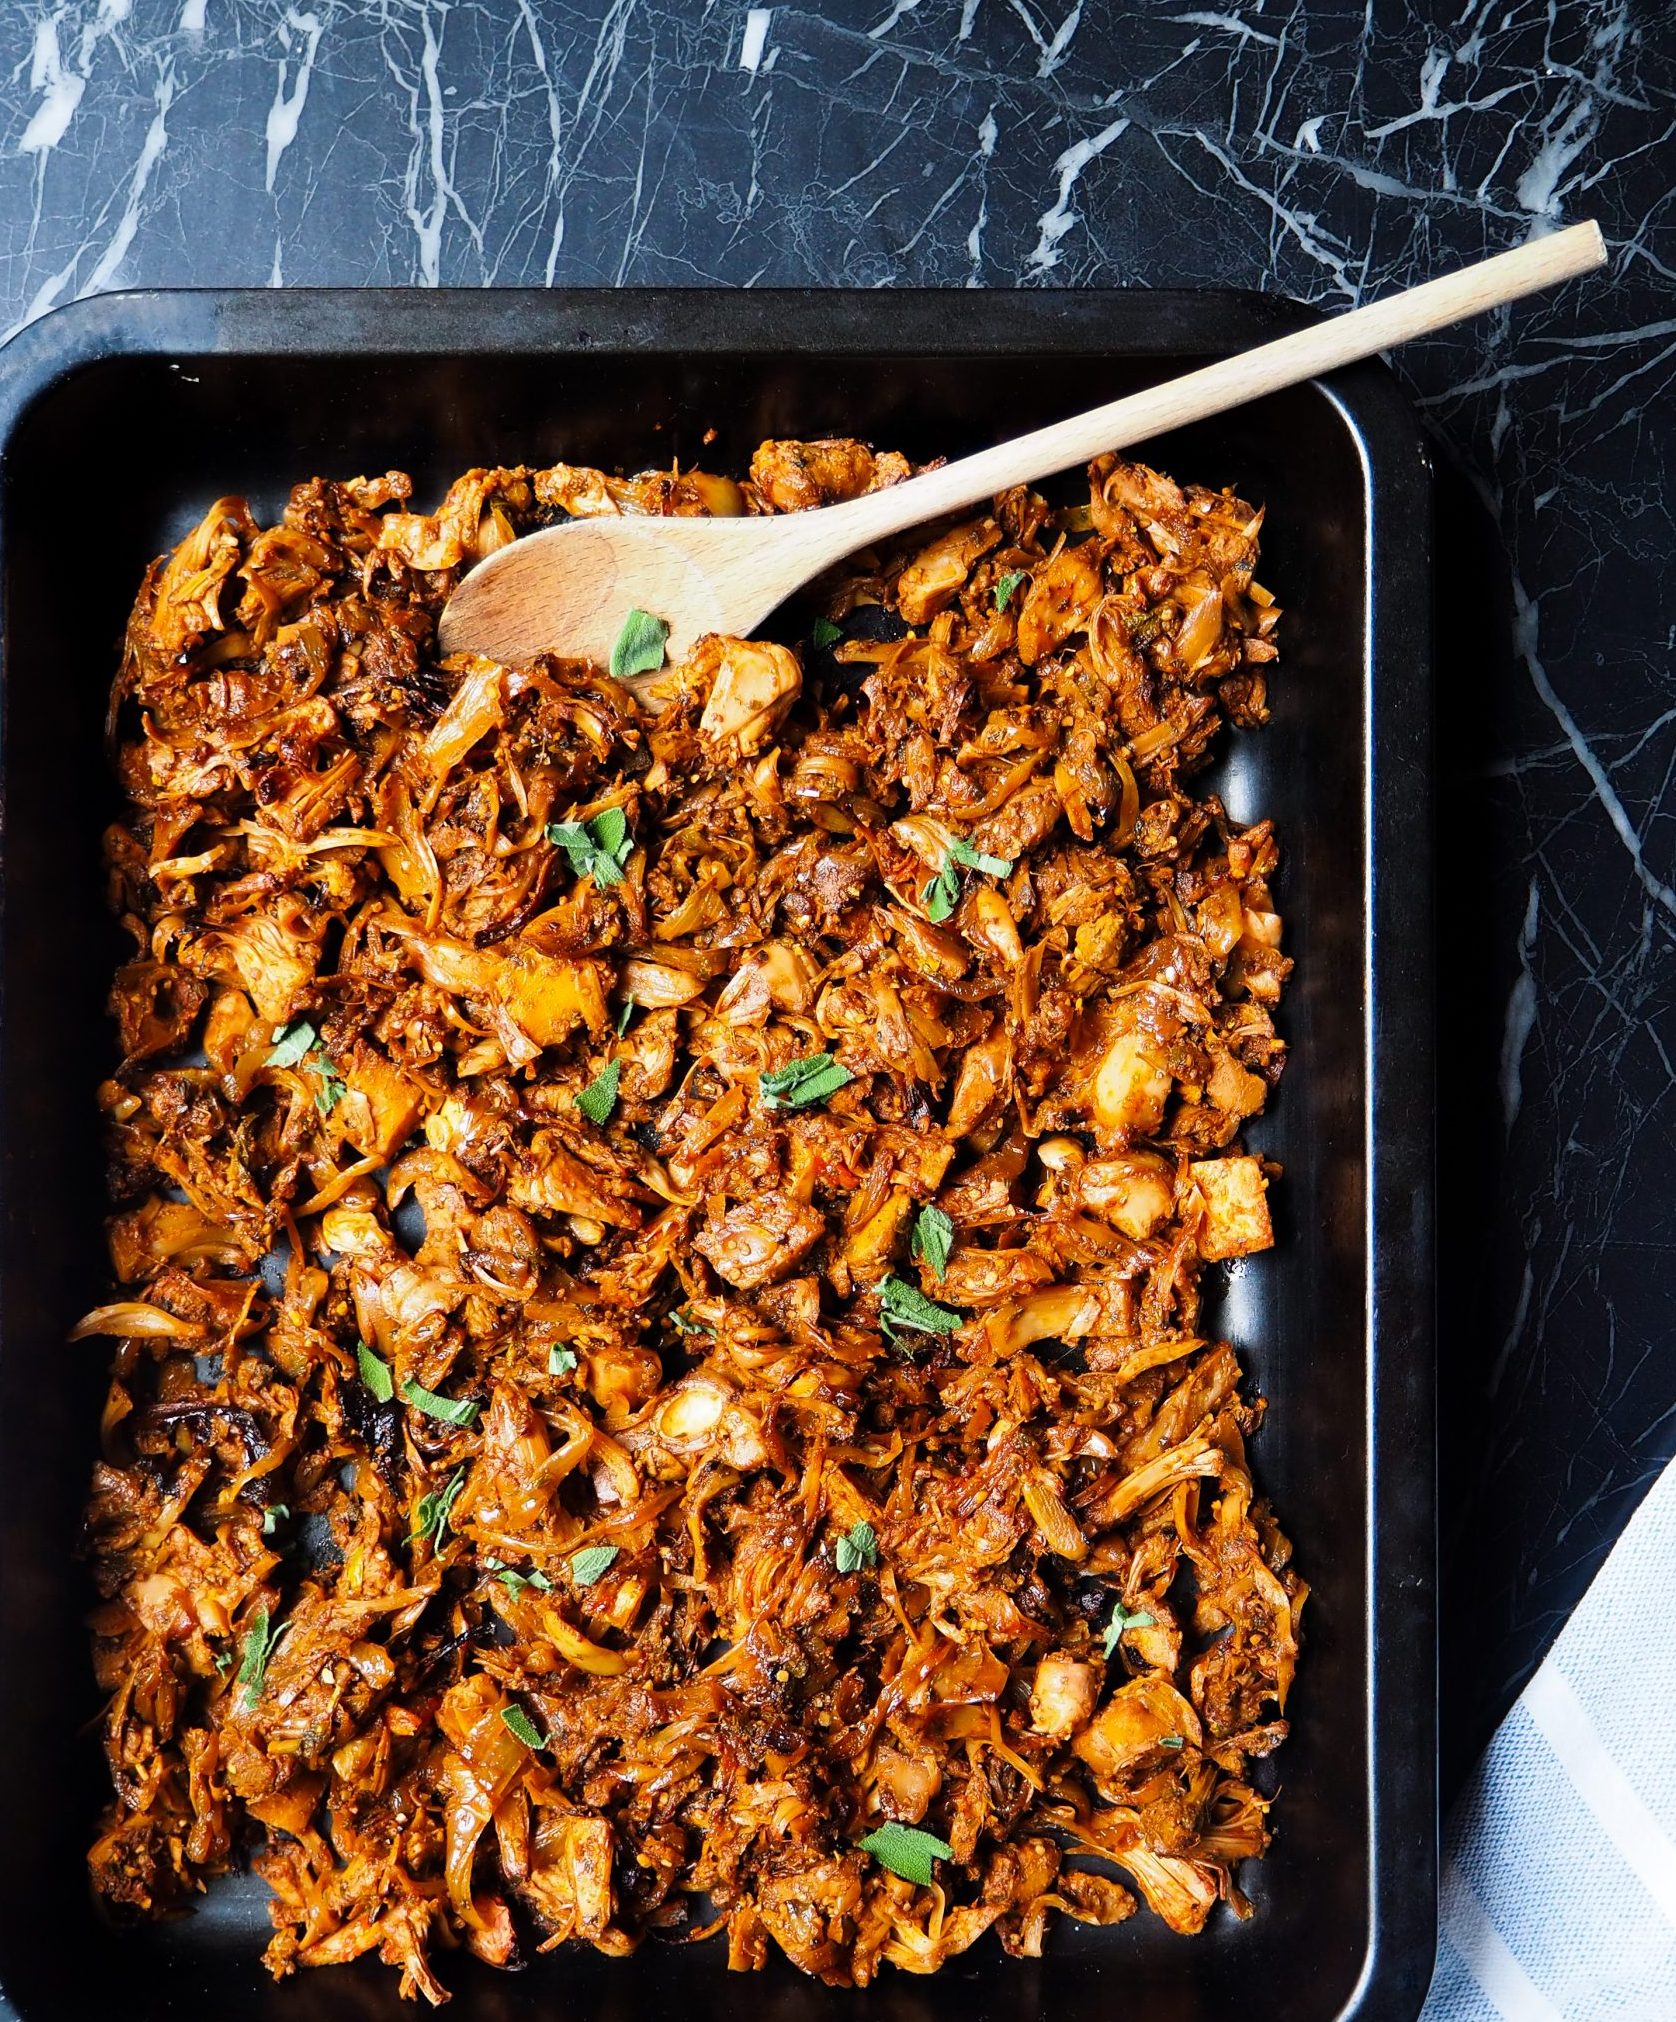
the one pan bbq sage jackfruit fresh from the oven ready to eat with a wooden spoon in the top end and bits of sage

Ready to serve.

Paprika, liquid smoke, granulated garlic, olive oil, some sugar, and fresh sage. That’s how we’ll get that delicious, smokey sweet sticky taste. Then, all that’s left is leaving it to roast in the oven. Easy right?

three bbq sage jackfruit buns

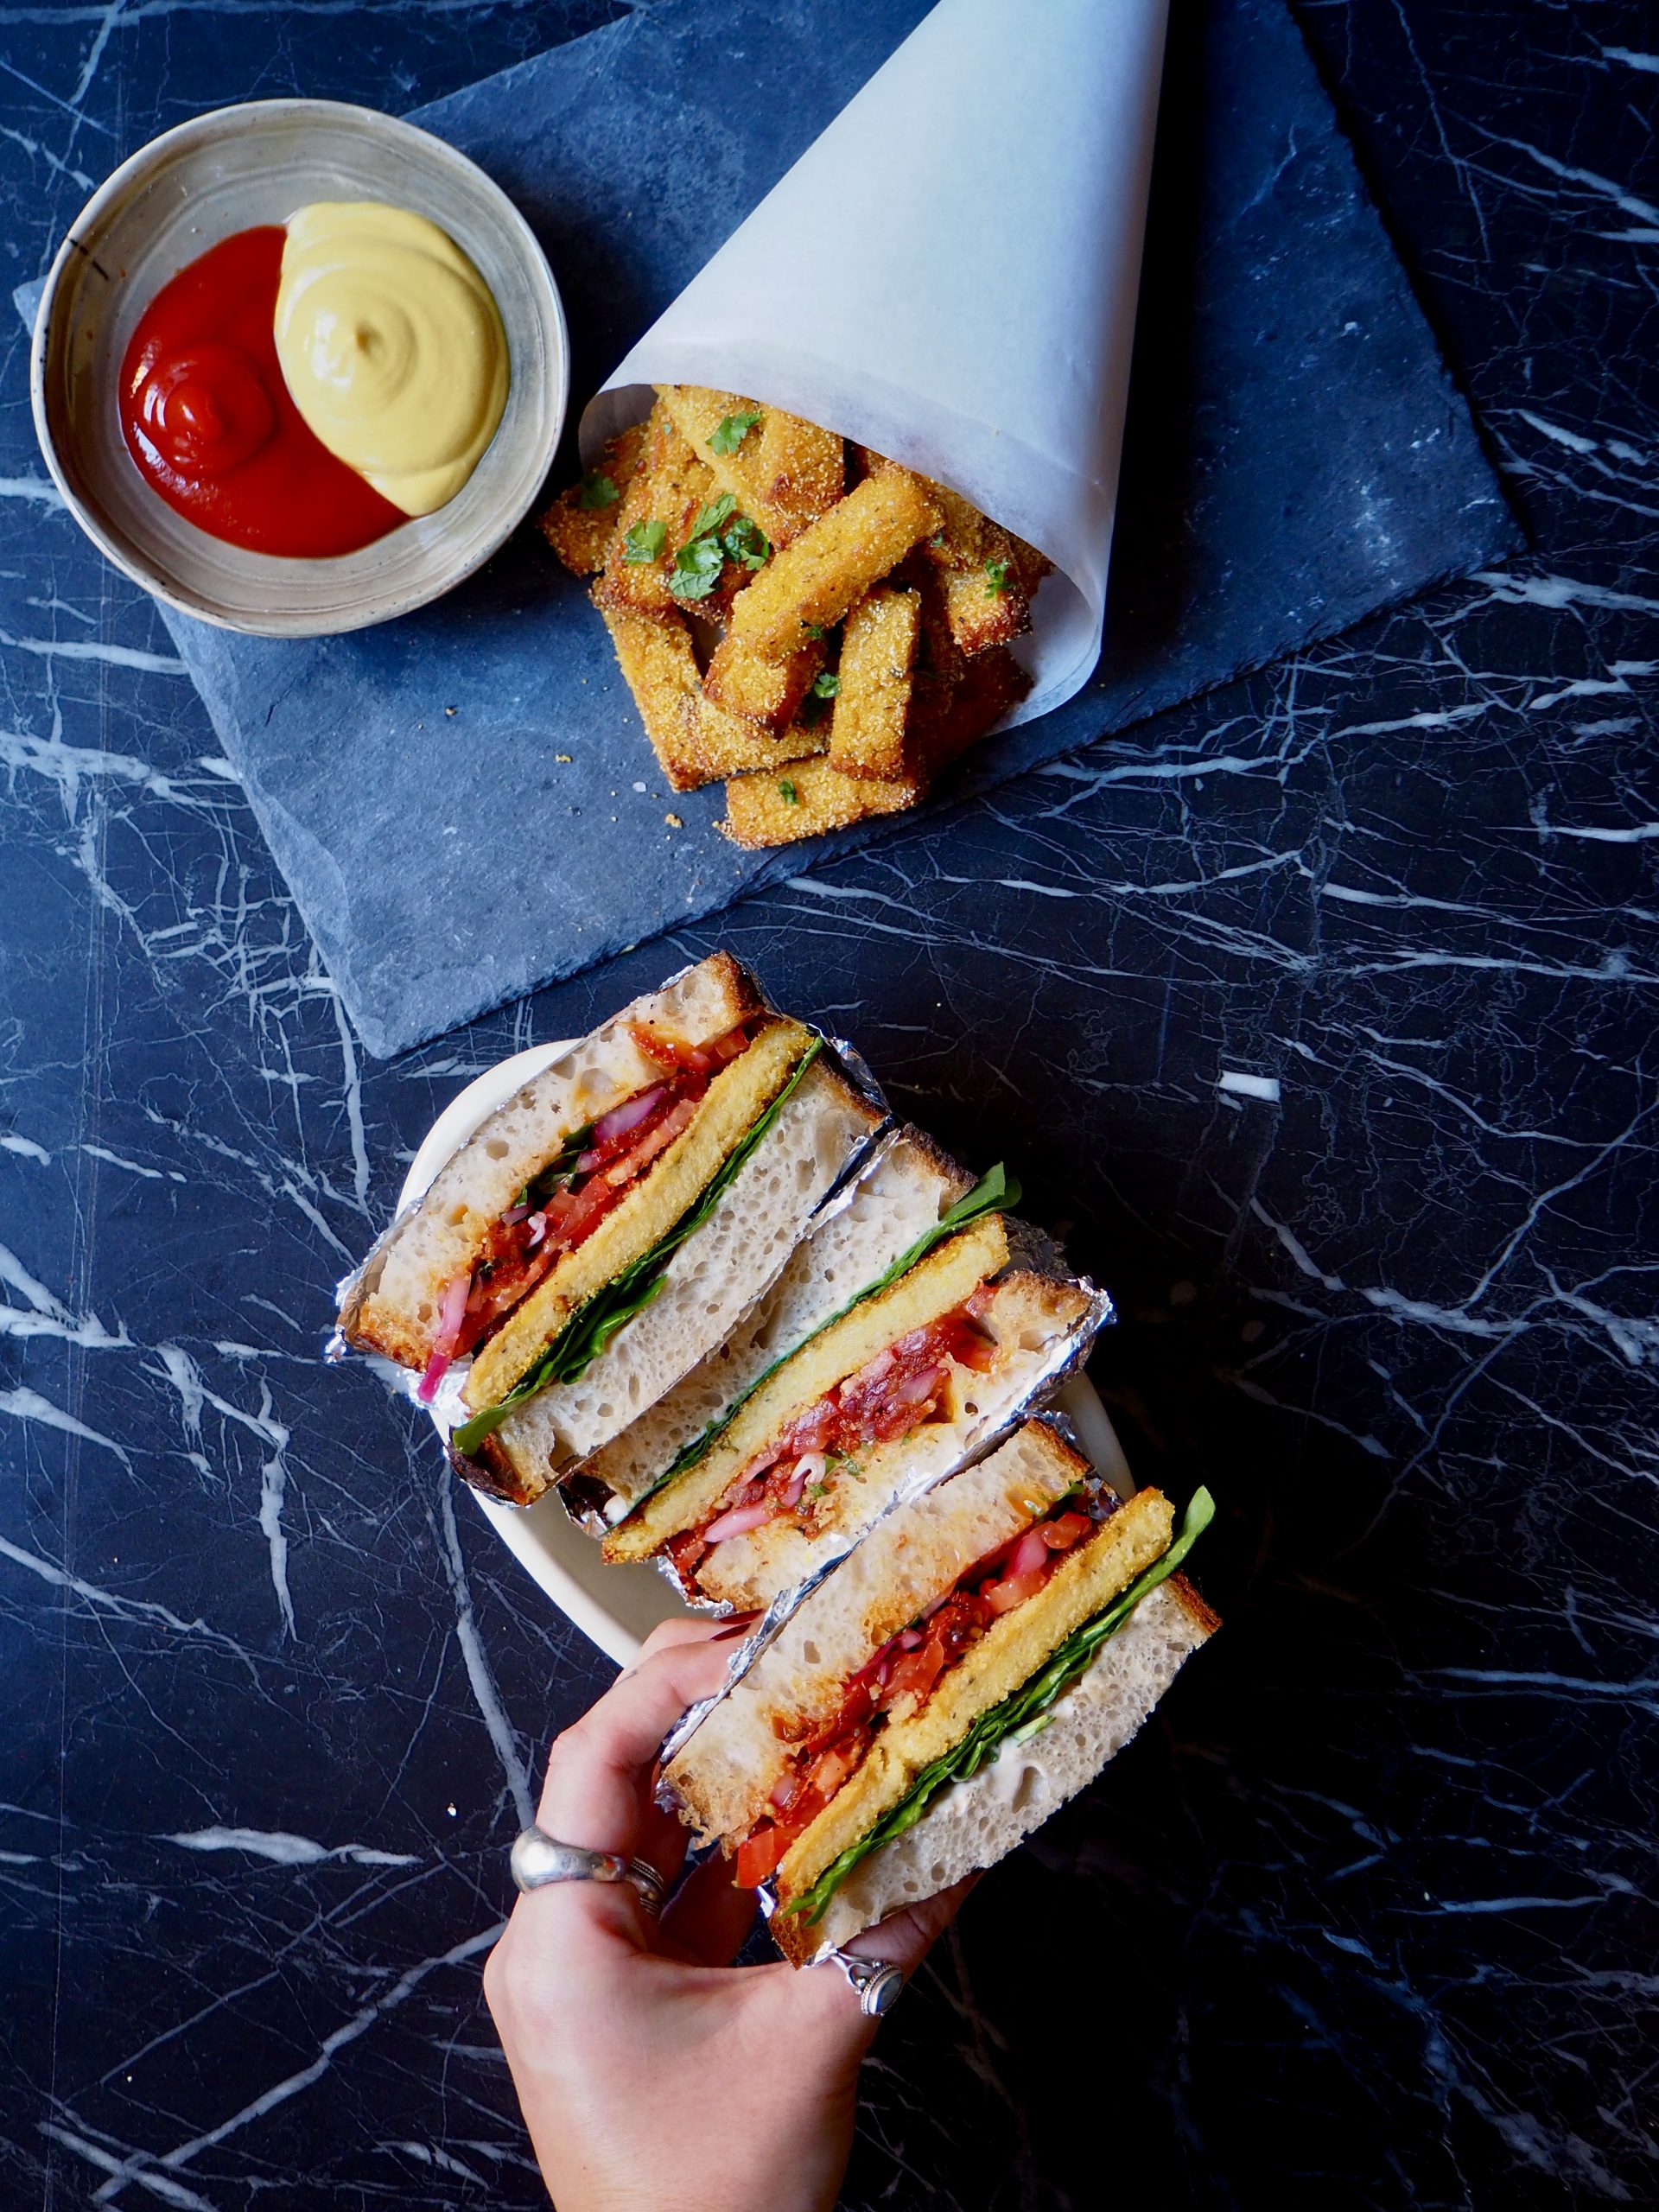
Pair with some coleslaw and a pickle.

I recommend serving the one pan BBQ-sage jackfruit on a bun with some slaw and a pickle for the ultimate experience. Also delicious with my aioli. But do let me know how you enjoy it!

As always, don’t forget to tag me in your pictures. Save to your laptop or on Pinterest, and leave me your comments!

the one pan bbq sage jackfruit fresh from the oven ready to eat with a wooden spoon in the top end and bits of sage

One Pan BBQ-Sage Jackfruit

BBQ flavour pulled jackfruit with sage, all in one pan!
Print Recipe Pin Recipe
Prep Time 15 minutes mins
Cook Time 1 hour hr
Total Time 1 hour hr 15 minutes mins
Servings: 4 people
Course: Dinner, Lunch
Cuisine: American
Ingredients Equipment Method Notes

Ingredients
  

  • 1 tins young green jackfruit in water 565 grams
  • 1 onion, diced
  • 2 cloved of garlic, diced
  • 4 tbsp olive oil
  • 1 tbsp liquid smoke
  • 1 tbsp ketchup
  • 1 tsp brown sugar
  • 2 tsp paprika
  • 1 tsp smoked paprika
  • 1 tsp granulated garlic or garlic powder is also fine
  • 1 tsp dried thyme
  • 1 tsp oregano
  • 1 tsp lemon juice
  • 1 small handful of sage, chopped finely
  • cracked black pepper
  • salt

Equipment

  • oven

Method
 

  1. Preheat oven to 200 °C (392 °F). Line a baking tray with parchment paper.
  2. Start with draining and rinsing the jackfruit. Then, get the harder bits off like described above. Squeeze the jackfruit to get some water out and pull it apart so there's smaller bits.
  3. Mix all the ingredients for the BBQ-Sage glaze and add to the jackfruit. Distribute well, covering all the onion, garlic, and jackfruit.
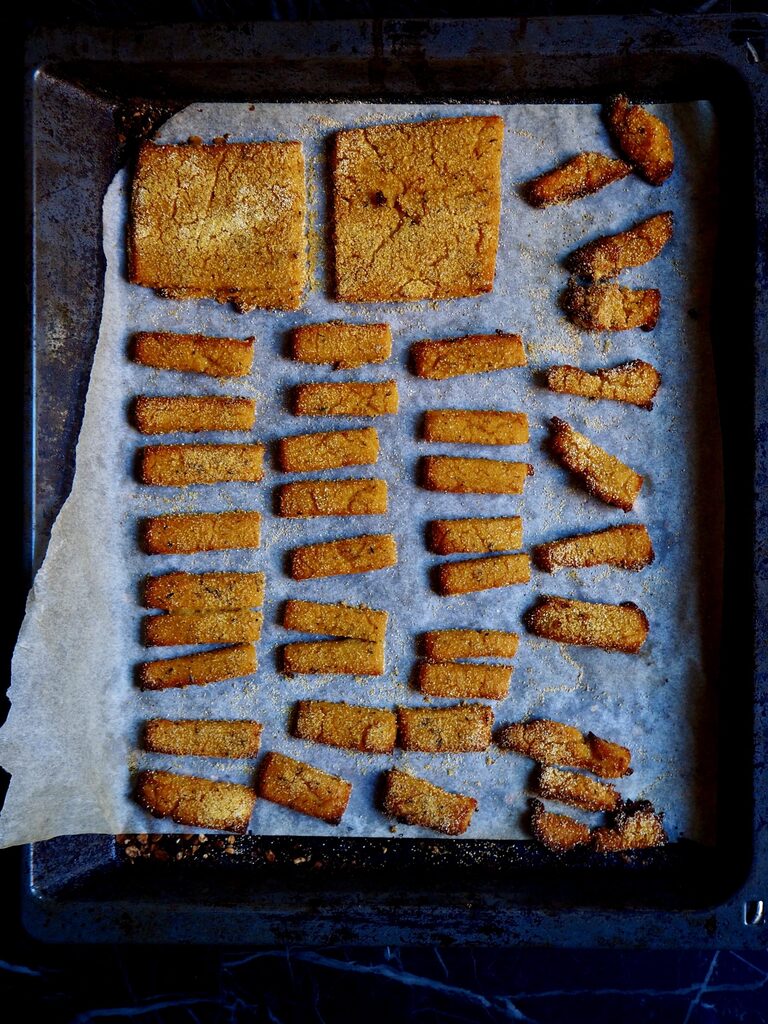
  4. Cover with foil and pop into the oven at 200°C. After 30 minutes, remove foil and bake for another 30 minutes.
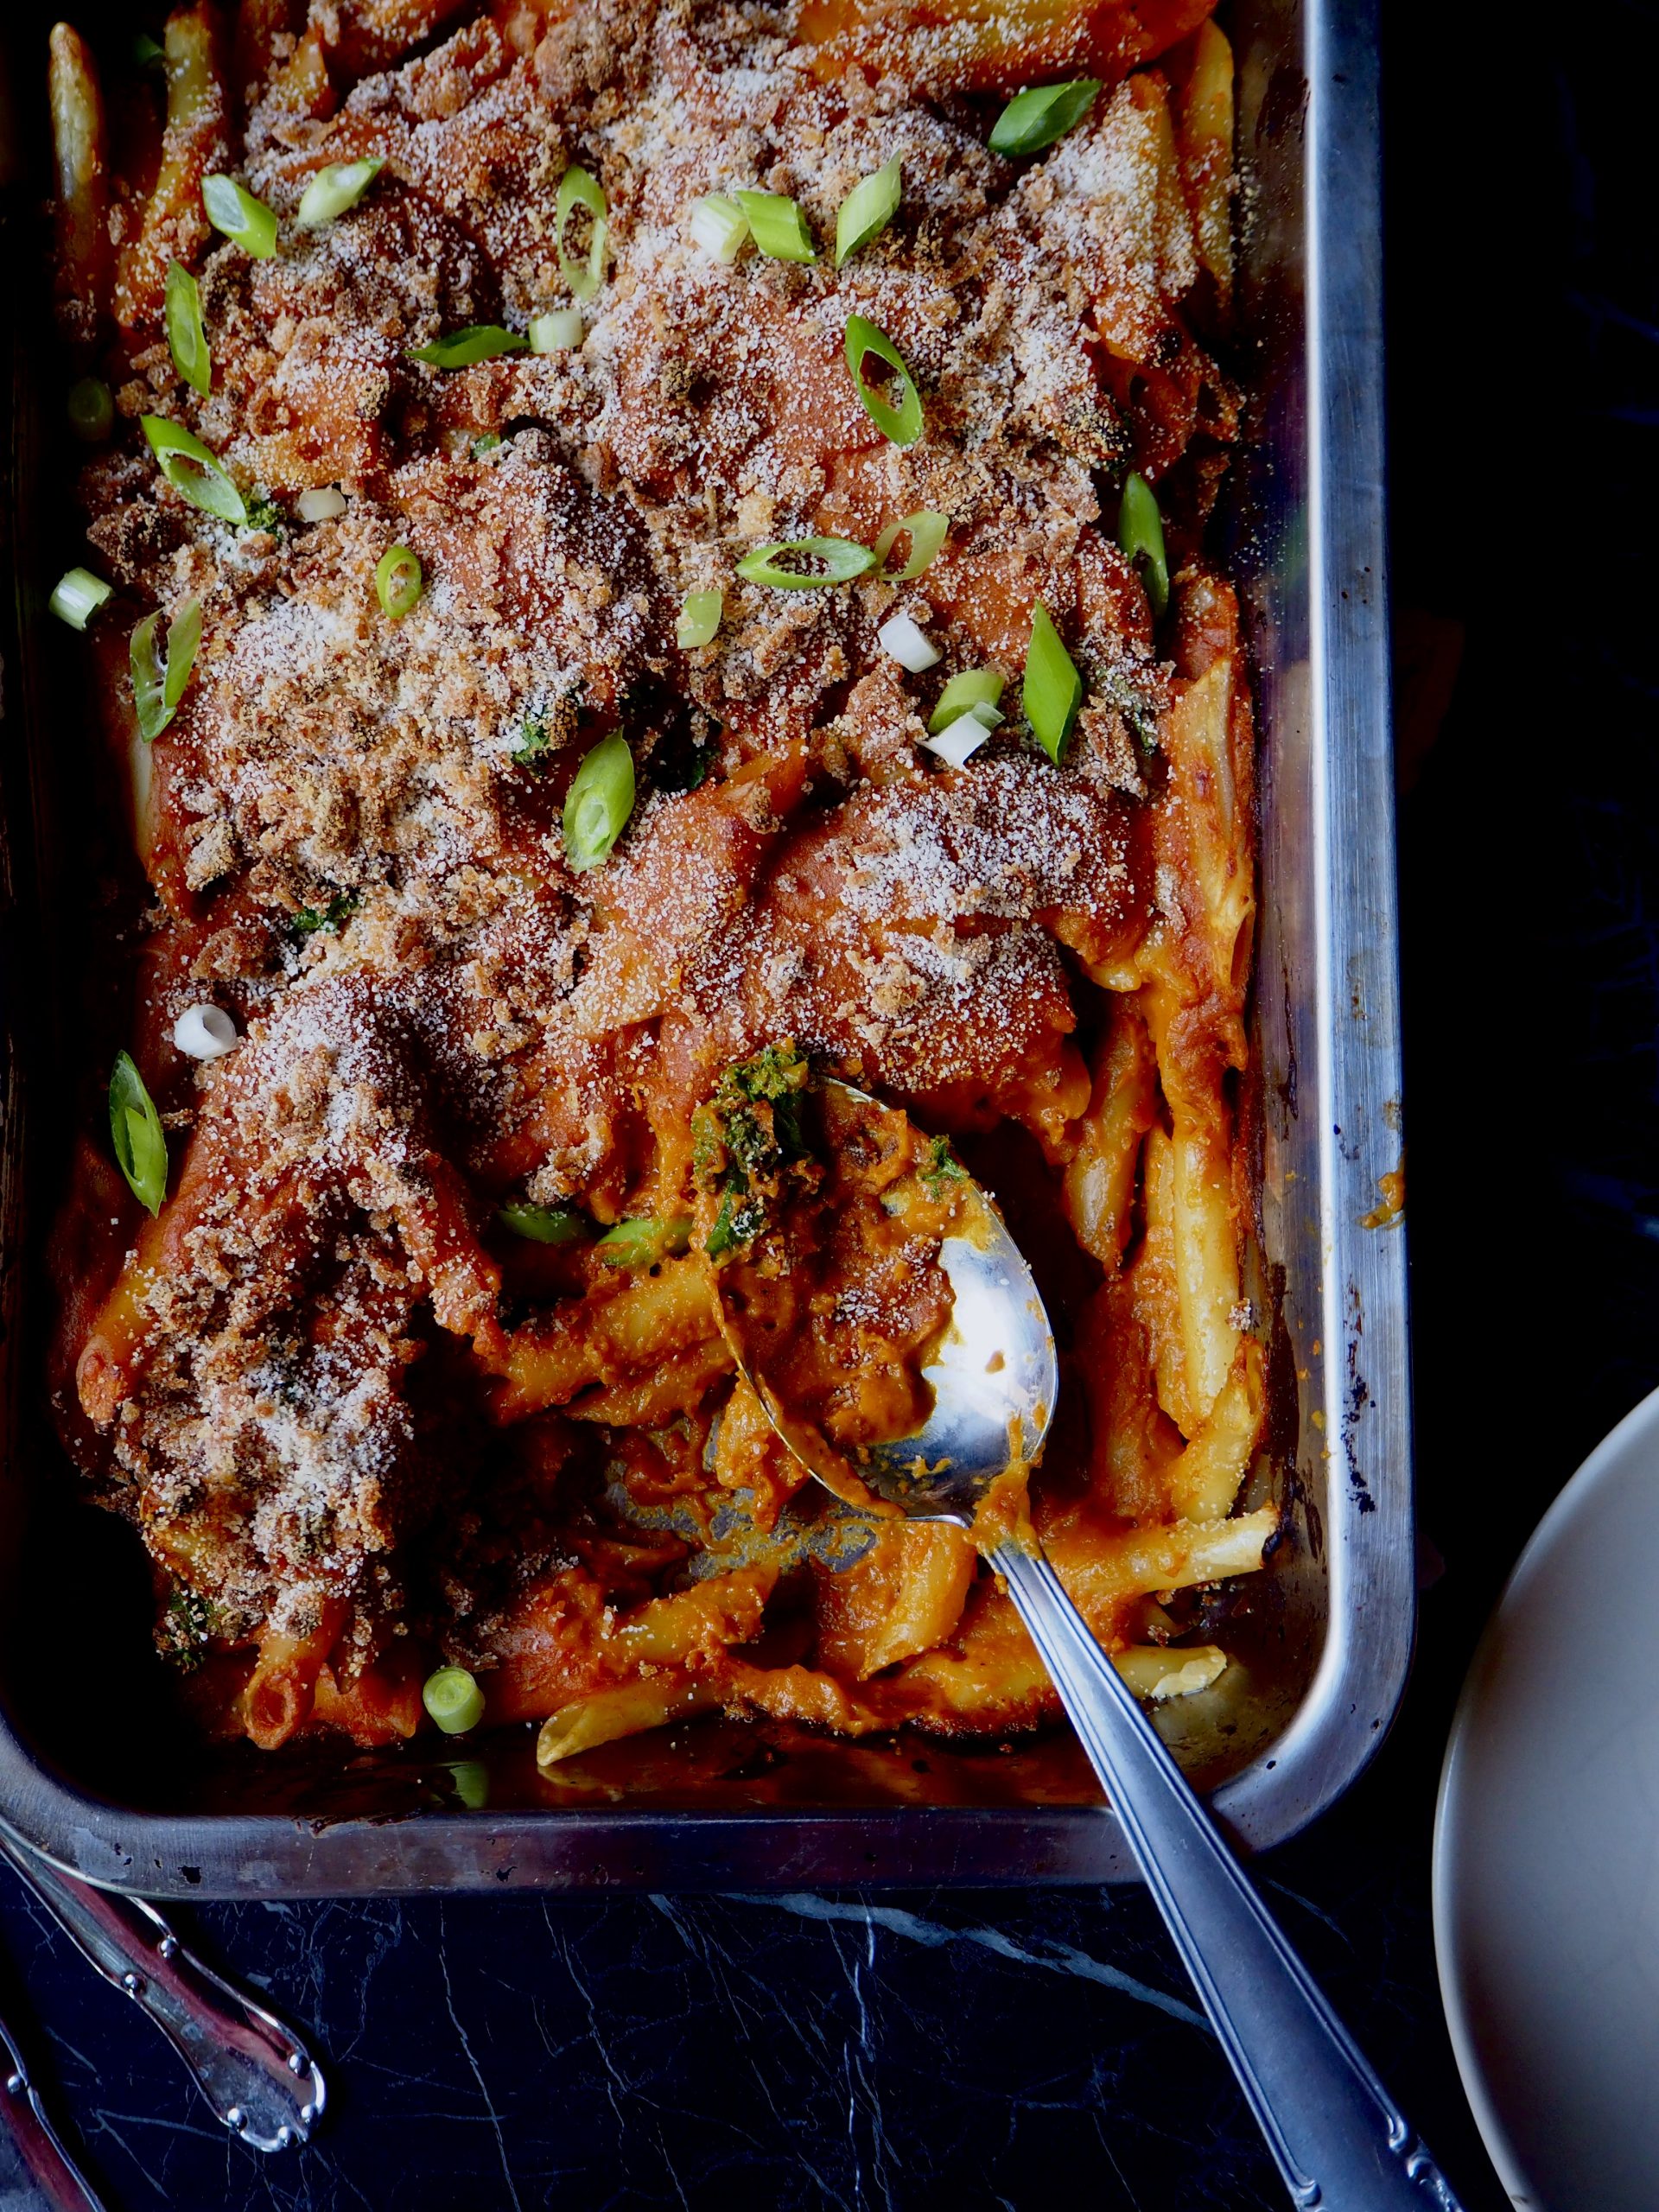
  5. Bake until completely golden brown with crispy bits around the sides. Yum!

Notes

This recipe is gluten free!
Keeps in the fridge for up to about 5 days. 
Tried this recipe?Let us know how it was!

Filed Under: dinner, lunch, recipes

Vegan Borani Banjan

18/11/2020 by Amber Leave a Comment

This vegan borani banjan is a vegan dish inspired by the traditional Afghan dish. I saw a recipe for it somewhere ages ago, unfortunately I couldn’t find the original anymore. But last year I decided to make a vegan version of what I could remember from the recipe. This is the result!

vegan borani banjan seen up close front view, two white bowls, a twig of mind, a little brown bowl with lemons to the side

The vegan borani banjan.

What is in borani banjan?

It’s a dish with charred aubergines, yoghurt, a tomato sauce laced with mint, and bulgur. For this version it’s roasted aubergines, a heavy-on-the-mint tomato sauce, pomegranate seeds, bulgur or coarse semolina with big white beans, and a dollop of cream.

a bowl of semolina with beans, pomegranate seeds, and mint seen from above with a wooden plank to the side with half a pomegranate

Semolina with white beans, pomegranate seeds, and mint.

Bulgur or Semolina

For this dish you can use semolina or bulgur. I personally enjoy both. So it’s up to you to choose which one you’d like or can get your hands on the easiest. What’s the difference? There isn’t really but read more about it here. If you’re gluten free you could go for rice or quinoa even.

Important for this dish (and every dish for that matter) is to flavour every element. We’ll sautée some onion and cook it with the semolina. Then, the beans go in, lemon juice, and pomegranate seeds.

Pomegranate & Mint

A little trick to peeling the pomegranate: cut it in half and then cut along the ‘veins’, that way you can easily get the seeds out, see the picture below for how I did it.

three photos of how to peel the pomegranate to get the seeds out

How to get those pesky seeds out.

The pomegranate seeds in this really take it to the next level. I love having a bite and then a hit from the pomegranate. The mint in the sauce and on top elevates the freshness of this dish. Also it offsets the rich, deep flavour of the roasted aubergine. The finish it all off, the traditional dish uses yoghurt. So, you can go a few ways for this vegan version. One would be to buy your favourite vegan yoghurt and use that. Two would be to buy some kind of vegan cream and use that cream. Alternatively, if you’re in the mood, you could make your own cashew cream and use that. I’d say the benefits of making your own cashew cream are manifold. You could have tacos the next day, or my enchiladas, or make a tzaziki!

two bowls of vegan borani banjan seen from abotve with a right hand grabbing the bottom bowl, some mint in the left corner, two lemons, a big bowl of semolina in the top corner and half a pomegranate

Grab your bowl before someone else does!

As always, please share with your friends. Leave me a comment on here or on Instagram. Save this on your computer or on Pinterest. And happy eating.

vegan borani banjan seen up close front view, two white bowls, a twig of mind, a little brown bowl with lemons to the side

Vegan Borani Banjan

Inspired by an Afghan classic. Semolina with white beans, pomegranate seeds, lots of fresh mint, a tomato sauce infused with mint, roasted aubergines, and a dollop of cream or yoghurt.
Print Recipe Pin Recipe
Prep Time 15 minutes mins
Cook Time 30 minutes mins
Total Time 45 minutes mins
Servings: 4 people
Course: Dinner, Lunch
Cuisine: Afghan, Middle Eastern
Ingredients Equipment Method Notes

Ingredients
  

Tomato Mint Sauce
  • 3 tbsp olive oil
  • ½ white onion, diced
  • 4 cloves of garlic, minced
  • salt
  • 1 tbsp balsamic vinegar
  • 1 tin chopped tomatoes (400 grams)
  • cracked black pepper
  • 2 big handfuls of mint, finely chopped
White Bean Semolina
  • 1 tbsp olive oil
  • ½ white onion, diced
  • salt
  • 1.5 cups coarse semolina or bulgur (±300 grams)
  • 1 bay leaf
  • 3 cups water (make sure you have a 1:2 ratio)
  • 1 tin big white beans (
  • 1 pomegranate
  • 1 lemon, squeezed
Roasted aubergine
  • 1 aubergine, quartered
  • salt
  • pepper
  • olive oil
  • 4 tbsp vegan yoghurt or cream
  • extra chopped mint
  • extra pomegranate seeds

Equipment

  • oven
  • Pot

Method
 

  1. Start by preheating the oven to 200 °C (392 °F). Quarter the aubergine, sprinkle with salt, and put to the side where it can release some of its moisture.
  2. Get a pot on a medium heat, add olive oil. Dice the onion and add to the pot. Sprinkle with salt. Add the garlic. Once softened and starting to brown, add the balsamic vinegar. Add the chopped tomatoes and black pepper and let simmer.
  3. Drizzle the aubergines with olive oil and pop in the oven for 30 minutes until golden brown.
  4. Rinse the semolina and drain. Get a pan on a medium high heat, add olive oil, and sautée the onion. Once softened, add the bayleaf and the semolina. Add water and bring to a boil. Once boiling, cover with a lid and boil for 15 minutes.
  5. Rinse the beans. Remove the seeds from the pomegranate.
  6. Add the chopped mint to the tomato sauce.
  7. Once the semolina has cooked for 15 minutes, take off the heat and let sit for 5/10 minutes.
  8. In a bowl, add the beans, the pomegranate seeds, the semolina, squeeze the juice of 1 lemon, and mix all together.
  9. Take the aubergines out of the oven.
To Serve:
  1. First add a serving of semolina-bean mix, top with a big spoonful of tomato mint sauce, the roasted aubergine, a dollop of yoghurt or cream, a bit of fresh mint, and some pomegranate seeds.

Notes

This all keeps in the fridge for a few days. I'd always say use a bit of common sense when keeping for in the fridge and reheating. 
 
Make this gluten free by using rice or quinoa! 
Tried this recipe?Let us know how it was!

Filed Under: dinner, lunch, recipes

miso sweet potato & quinoa bowl

09/11/2020 by Amber 1 Comment

This miso sweet potato and quinoa bowl has it all. Miso glazed sweet potato, quinoa, chickpeas, leafy greens, and more. Topped with a miso vinaigrette. Some sesame seeds, and a sprinkling of crispy onions.

bowl with miso glazed sweet potato, quinoa, spinach, chickpeas, miso vinaigrette, red onion, and crispy onion on top seen from up close

The end result

Miso Glazed Sweet Potato

For this recipe we’ll be roasting the sweet potato cubes in a miso marinade. The sugar in the sweet potato and the added bit of sugar in the marinade makes them go very nice and crispy. The edges caramelise in the oven and go lovely crispy and chewy.

miso glazed sweet potato cubes just from the oven seen from above on a baking sheet with parchment paper and two spoons

Fresh from the oven

To coat the sweet potato cubes I like to put them in a Tupperware with the marinade. Then I just give them a good shake. Takes a lot of the work out of having to stir them around a bowl. All that’s left is spreading them out on a baking sheet and popping them in the oven.

Miso ‘Vinaigrette’

To round out the flavours, we’re dressing this salad with a sort of vinaigrette. I personally love a classic vinaigrette. The tartness, slightly sour, sweet flavours go so well with some crisp greens. Simply by using some miso paste instead of the traditional mustard we’ve made the vinaigrette. For this one I like to use a light miso, like this one. A bit of lemon juice, some agave, and olive oil. Delicious.

two miso sweet potato and quinoa bowls seen from above against a dark backdrop and a hand holding one of the bowls

Top with the miso vinaigrette and dig in!

Building the Bowl

The sweet potato and vinaigrette add a lot of flavour to the dish. Hence we’re keeping the rest fairly simple. A good handful of spinach. (Use another leafy green vegetable if you’re no fan of spinach). Quinoa, chickpeas, a quickly pickled red onion, sesame seeds, and crispy onion bits. As you’ll learn, I love crispy onion bits. (I also used them on my Mac ‘n Cheese).

The quinoa can be cooked according to the instructions on the packet. I like to give my grains a rinse before cooking. I so about 1:2 quinoa to water ratio. Add a bit of salt to the water, a splash of sesame oil, a bay leaf.

front view of two miso sweet potato and quinoa bowls

Dinner (or lunch) is served!

As per usual, share this miso sweet potato & quinoa bowl recipe! Pin it to Pinterest, bookmark, send to your pals. Leave me a comment here or on Instagram when you make this!

bowl with miso glazed sweet potato, quinoa, spinach, chickpeas, miso vinaigrette, red onion, and crispy onion on top seen from up close

Miso Sweet Potato & Quinoa Bowl

A filling, plant-based bowl of goodness: miso glazed sweet potato, quinoa, leafy greens, and more topped with a miso vinaigrette
Print Recipe Pin Recipe
Prep Time 5 minutes mins
Cook Time 30 minutes mins
Total Time 35 minutes mins
Servings: 2 people
Course: Dinner, Lunch
Ingredients Equipment Method Notes

Ingredients
  

  • 1 large sweet potato, peeled and cubed
The Miso Glaze
  • 1 tbsp miso
  • 1 tsp lemon juice
  • 1 tsp sugar (brown or cane)
  • 1 clove of garlic, grated
  • 2 tbsp olive oil
  • 1 knob of ginger, grated (about 2x2 cm/1x1")
Bowl
  • ½ cup quinoa (±75 grams per person)
  • 1 cup cooked chickpeas (±50 grams per person)
  • 2 handfuls of spinach
  • ½ red onion, sliced (option: quick pickled in a bit of vinegar with sugar and salt)
  • 1 tbsp sesame seeds, black & white
  • 1 tbsp crispy fried onion bits
  • fresh coriander
Miso Vinaigrette
  • 1 tbsp miso
  • 1 tbsp agave (or maple)
  • 1 tbsp lemon juice
  • 1 tbsp olive oil
  • cracked black pepper
  • tiny pinch of salt

Equipment

  • oven
  • Pan

Method
 

  1. Preheat your oven to 200 °C and line a baking sheet. Start by peeling the sweet potato and cutting it into cubes.
  2. Then we'll move onto the miso glaze. In a cup, combine the miso, lemon juice, sugar, garlic, olive oil, and ginger. Whisk together. Coat all of the sweet potato cubes and get them onto your baking sheet. Pop into the oven for 30 minutes or until crispy and browned.
  3. Now cook the quinoa according to the instructions. Rinse the chickpeas and set aside, season with a bit of salt and pepper.
  4. Get a bowl for the miso vinaigrette. Add the miso, agave, lemon juice, olive oil, salt and pepper and whisk. Cut the onion and if you're going for it, make a quick pickle by putting the red onion in a bowl with a splash of vinegar, sugar, and salt.
  5. Get two bowls ready to serve. Add the spinach, the cooked quinoa, the chickpeas, the sweet potato, the red onion, the crispy onion bits, the sesame seeds, the vinaigrette, and a bit of fresh coriander.
  6. Enjoy!

Notes

This recipe is totally gluten free. 
You can keep the sweet potato in the fridge for up to a few days. Reheat in the oven or enjoy cold! I even put some in a sandwich and yum, it was delicious. 
Tried this recipe?Let us know how it was!

Filed Under: dinner, lunch, recipes, Uncategorized

Crispy Polenta Two Ways

01/11/2020 by Amber Leave a Comment

What if I told you that you could make crispy polenta not one, but two ways? Baked, crispy polenta is such a nice meal. Don’t get me wrong, regular cooked polenta is lush. But shaped like chips and crunchy? Oh yeah. I’ll be taking you through the steps of making polenta first. Then how to get it to crispy by just baking it in the oven. What’s more? We’re going to serve it up in two different ways. Crispy polenta chips (or fries) and a polenta fillet to pop in a sandwich.

crispy polenta two ways seen from above: the polenta sandwiches and polenta chips with a bowl of ketchup and mustard

Polenta treats anyone?

Polenta

Polenta is a dish made with cooked corn meal. It’s very typical around parts of Italy, France, Switzerland, and some other spots. Delicious and a great gluten free option too! Although you could just cook it and be done with it, you can also bake it. Or fry it! But we’re going for oven baked here to save ourselves the hassle.

cooked polenta seen from above in a pot with a black spatula

Cooked polenta ready to cool.

Let’s start with cooking the polenta in part water, part milk. Of course, I mean a plant-based alternative to milk. We’ll season the liquid, bring it to a boil, and pop in the polenta. With polenta, it’s important you keep stirring while it thickens up. This should only take about 3 minutes, maybe 5. We’ll season the cooking liquid with salt, pepper, oregano, paprika, nutritional yeast, and a bit of nutmeg.

the cooled polenta before hitting the oven being sprinkled with some polenta with my right hand seen from above

Brush with oil and sprinkle with polenta for extra crispiness.

Crispy polenta

To get the polenta nice and cwispy (looking at you, Joshua Weissman) we’re letting it cool first. Then, we’ll cut it into the shapes we want, cover with a bit of oil and sprinkle on some more polenta. Bake it at a high heat, and ta-da! Crispy polenta. Soft, tender in the middle.

crispy polenta fresh from the oven seen from above on some parchment paper

Fresh from the oven, ready to eat!

We’ll serve the polenta chips with a bit of mustard, ketchup, any dip you fancy! The polenta ‘fillets’ I decided to put between two slices of sourdough. A spoonful of aioli (recipe found here). Also going on there: spinach, fresh mint, sun dried tomatoes, and red onion.

the polenta sandwich seen from up close with the other sandwiches and the polenta chips with sauce in the background

Dig right in!

As always, save this recipe. Pin to Pinterest. Share and leave me a comment here or on Instagram! Happy eating!

crispy polenta two ways seen from above: the polenta sandwiches and polenta chips with a bowl of ketchup and mustard

Crispy Polenta Two Ways

Crispy baked polenta from the oven, two ways! Both chips and a crispy polenta 'fillet' for a delicious sandwich.
Print Recipe Pin Recipe
Prep Time 5 minutes mins
Cook Time 35 minutes mins
resting time 1 hour hr
Total Time 1 hour hr 40 minutes mins
Servings: 2 people
Course: Dinner, Lunch
Cuisine: Italian
Ingredients Equipment Method Notes

Ingredients
  

  • 300 ml water 1 cup
  • 300 ml oat milk 1 ¾ cup (or any other alternative you prefer)
  • pinch of salt
  • pepper
  • 2 tbsp nutritional yeast
  • 1 tsp oregano
  • 1 tsp paprika
  • ½ tsp nutmeg
  • 1 tsp garlic powder
  • 187.5 grams polenta (1 heaping cup)
  • 2 tbsp polenta (for dusting)

Equipment

  • Pot
  • oven

Method
 

  1. Start with getting the water and milk to a boil. Add all the seasoning; salt, pepper, oregano, paprika, nutmeg, garlic powder, and nutritional yeast.
  2. Once it's boiling, add the polenta, turn the heat down, and keep stirring until it's thickened up. Only do this for about 3 minutes.
  3. Transfer the polenta to a baking sheet or tray and spread out to about an inch (1.5 cm) thick. Put in the fridge for an hour.
  4. Once the hour is over, pre-heat your oven to 220 °C (428 °F). Brush the polenta with olive oil and cut into the desired shapes. Dust with polenta and pop in the oven for 30 minutes.
  5. Enjoy!!
Crispy Polenta Sandwich
  1. Take two slices of bread, spread on aioli on one side, add spinach, add the polenta, sun dried tomato, pickled red onion, a bit of coconut sriracha, salt, pepper, and some fresh mint.

Notes

Polenta is gluten free. If you use gluten free bread, this is entirely GF.
Keeps in the fridge for a few days but best eaten straight away.
Tried this recipe?Let us know how it was!

Filed Under: dinner, lunch, recipes, sandwiches, Uncategorized

boozy vegan mac ‘n cheese

25/10/2020 by Amber 2 Comments

This boozy vegan mac ‘n cheese has a surprise ingredient. Can you guess? It’s a shot of tequila. I know, wild. These days I don’t seem to be drinking tequila anymore. So I decided to put it in my food.

booze vegan mac 'n cheese seem from above with a serving spoon in the right bottom corner

Autumnal mac & cheese comin’ in hot.

Tequila? Are you mad?

Let me put your worries to rest. No it doesn’t make the mac ‘n cheese taste like tequila. It’s just one of the many flavours we’re adding. If you really don’t like tequila, or if you’re staying away from alcohol altogether; feel free to leave it out! Obviously, cooking with booze makes the alcohol evaporate. What’s left is a nice depth of flavour. Like adding a red wine to a bolognese. Or white wine to a creamy mushroom sauce. Or penne alla vodka.

the boozy vegan mac 'n cheese before going into the oven with bits of kale seen from above

Sneak in a bit of kale if you’d like!

The mac ‘n cheese sauce

I’ve been testing a mac ‘n cheese recipe here and there for a while now. And I’m very happy with the end result. This sauce is completely soy and nut free. Which makes it great for people with common allergies. We’re using a few vegetables and some other flavour inducers to make a lovely, creamy, rich sauce. A fall classic.

the mac n cheese sauce after blending in a silver bowl

The sauce after blending.

A very important part of making this sauce is the deglazing. That’s the part where you incorporate all the nice bits in the pan into the liquid. It’s what gives the dish a depth of flavour and that umami we’re looking for. I’m also using Marmite again (I also did in this recipe). If you’re more of a Vegemite fan, no problem. If you don’t like either of them or you don’t have access to the product; also fine. You could maybe use a stock cube instead. The reason I like adding it, is it’s salty, umami, and provides that yeasty, cheesy goodness in the flavour palette.

mac n cheese being sprinkled with crispy onions before going into the oven with a right hand holding the bowl and sprinkling

Sprinkling the crispy onion on top before hitting the oven.

Finally, we’re topping the mac ‘n cheese off with a bit of crunch and baking it in the oven. In my opinion mac ‘n cheese should always be baked. Who doesn’t love those crunchy bits on top?? When baking a pasta dish, make sure you cook the pasta very al dente. It’ll be cooking through a bit more in the oven and overcooked pasta is.. just.. no. I love using these penne from Barilla.

Like always, save this recipe for boozy vegan mac ‘n cheese, pin it to your Pinterest, share with friends and family, and enjoy!!!

front view of a serving of the boozy vegan mac n cheese on a white plate with the oven tray in the back

Serve right away with some spring onion on top!

booze vegan mac 'n cheese seem from above with a serving spoon in the right bottom corner

Boozy vegan mac 'n cheese

An autumnal, plant-based version of the classic mac 'n cheese with a twist: tequila!
Print Recipe Pin Recipe
Prep Time 15 minutes mins
Cook Time 45 minutes mins
Total Time 1 hour hr
Servings: 4 people
Course: Dinner, Pasta
Cuisine: American
Ingredients Equipment Method Notes

Ingredients
  

  • 1 tbsp margarine
  • +2 tbsp olive oil (i used my chilli infused oil)
  • 1 onion, diced
  • 4 cloves of garlic, crushed
  • pinch of salt
  • 1 red pepper, finely diced (bell pepper/capsicum)
  • 1 tbsp tequila (gold)
  • 1 tbsp tomato purée (concentrate)
  • 1 tbsp Marmite
  • 1 tsp rice vinegar (other vinegar works too)
  • 5 sun dried tomatoes (finely diced)
  • 1 tbsp flour
  • 400 ml unsweetened oat milk (or any other milk of your preference)
  • 100 ml water
  • 1 small butternut squash, in small cubes
  • 1 carrot, in small cubes
  • 1 small sweet potato, in cubes
  • 1 small potato, in cubes
  • cracked black pepper
  • 1 tsp oregano
  • 1 tsp paprika
  • ½ tsp smoked paprika
  • ½ tsp chilli flakes
  • ½ tsp nutmeg
  • ½ tsp turmeric
  • 25 grams nutritional yeast (½ cup)
  • 500 grams penne lisce (pasta of your choice)
  • 2 stalks of kale optional!
  • 30 grams crispy onions (±2 tbsp)
  • 30 grams bread crumb (±2 tbsp)

Equipment

  • oven
  • Hand mixer
  • Pan

Method
 

The Mac 'n Cheese sauce
  1. Get a pan on a medium high heat, add the margarine and olive oil and when hot, add the onion, garlic and a sprinkle of salt. Cook down a bit.
  2. Add the red pepper and let this cook down more and lightly brown while you chop the rest of your vegetables.
  3. Once it's started to lightly brown in the pan, we're going to move in a few quick steps. First we're deglazing with the tequila. Then in goes the tomato purée, Marmite, the rice vinegar, the sun dried tomatoes, and the flour. Stir it all well to incorporate and then add the milk and water.
  4. Make sure you scrape down the bottom of the pan to incorporate all those nice bits into the sauce. Now add all the other veggies; the butternut squash, carrot, sweet potato, and potato. Turn down the heat to a low-medium heat.
  5. Add the pepper, oregano, nutmeg, turmeric, paprika, and smoked paprika. Cover with a lid and let this cook until the veggies are tender for 15 minutes.
  6. In the meantime, get your hand mixer or blender ready and do a bit of cleaning up.
  7. Once the 15 minutes are done, transfer everything from the pan into a bowl. Set aside while you give the pan a quick rinse and get the pasta water to a rolling boil.
  8. While you wait for the water to boil, add the nutritional yeast, and blend the sauce until it's smooth. Stir the crispy onion and bread crumb together in a small bowl.
  9. Pre-heat your oven to 200 °C (392 °F)
  10. Add the pasta to the pot and cook al dente. I use the penne lisce and they cook al dente in 8 minutes so I cook them for 7. Get a baking tray ready with a bit of olive oil.
Assembling the Mac 'n Cheese
  1. Drain the pasta and add to the baking tray. Stir in the sauce, add the kale if you want, and top with more sauce. Top with the crispy onion and bread crumb.
  2. Bake for 10/15 minutes, until golden brown on top.
  3. Serve with some fresh spring onion on top.

Notes

This recipe can easily be made gluten free if you use GF pasta and GF bread crumbs. and flour! You could sub for rice flour for example. 
Keeps in the fridge up to around 5 days. You can re-heat in the oven. (or microwave).
Tried this recipe?Let us know how it was!

Filed Under: dinner, lunch, pasta, recipes

Enchiladas with roasted vegetables

18/10/2020 by Amber 1 Comment

These enchiladas with roasted vegetables are so good. These enchiladas are perfect for autumn and winter. They’re filled with a lovely homemade salsa and seasonal veggies. Then topped with your favourite vegan cheese.

enchiladas with roasted vegetables seen from above topped with coriander, spring onion and lime.

Enchiladas with roasted vegetables.

Seasonal roasted vegetables

I absolutely love autumnal veggies. Squash, sweet potato, kale, delicious. We’re also adding potato, onion, garlic and corn to the mix. If you don’t like any of the vegetables we’re using here, feel free to replace with one you do like! We’ll be leaving them to roast while we make the sauce.

the seasonal vegetables in an oven tray with a wooden spoon seen from above

The seasonal vegetables ready for the oven.

Enchilada sauce

Once we’ve popped the vegetables in the oven, we’re going to prepare the sauce. This sauce needs to be packed chock-full of flavours. Smoked paprika, dried chillies, cumin, cilantro. We’ll start by sautéing the onion, garlic, and red pepper. Then we’re adding the dried ñora chillies. I recommend you pick a dried chilli that you like. It’s also fun to experiment with different types of chillies. Serrano, poblano, green chillies, jalapeños. Those would all work lovely in this recipe. I’ve decided to take out the seeds so the spiciness doesn’t overpower the other flavours. However, if you like it spicy, leave the seeds in!

the salsa enchilada seen from above with beans and corn and spring onion

The salsa enchilada

Before adding the beans and corn, it’s important to blend the sauce. Once that’s done, it’s time for assembly!

Enchiladas

To prepare the enchiladas, get a baking tray ready with some olive oil or baking paper. You can use corn or wheat tortillas, whatever you prefer. Take a tortilla, fill it with the sauce and a generous helping of roasted vegetables. Roll it up and place it in the baking tray. You’ll continue this process until your baking tray is full. Once full, cover with sauce and cheese. Plenty of cheese. If you’d like to see a short little clip of how I assemble the enchiladas, take a look here.

The enchiladas with roasted vegetables seen from above with lime, avocado, coriander, spring onion

Delicious seasonal enchiladas.

Make sure you save this recipe! And if you’re looking for an autumnal dish, check out this minestrone recipe!

enchiladas with roasted vegetables seen from above topped with coriander, spring onion and lime.

Enchiladas with roasted vegetables

The Mexican classic with an autumnal twist: roasted seasonal vegetables. Perfect for a cosy homemade meal.
Print Recipe Pin Recipe
Prep Time 20 minutes mins
Cook Time 55 minutes mins
Total Time 1 hour hr 15 minutes mins
Servings: 4 people
Course: Dinner
Cuisine: Mexican
Ingredients Equipment Method Notes

Ingredients
  

Roasted vegetables
  • olive oil
  • ½ onion, sliced
  • 2 cloves of garlic, whole
  • 1 potato, in small cubes
  • 1 sweet potato, in small cubes
  • 125 grams corn
  • ½ red pepper, in cubes
  • ½ small squash, in cubes
  • 2 stalks of kale
  • ½ tsp dried crushed chillies
  • ½ tsp granulated garlic (garlic powder is also fine)
  • salt
  • pepper
Sauce
  • olive oil
  • ½ onion, roughly diced
  • 3 cloves of garlic, diced
  • salt
  • ½ red pepper, diced
  • 2 dried ñora chillies, washed and diced
  • 800 grams tinned tomatoes
  • 2 tsp paprika
  • 2 tsp oregano
  • 1 tsp smoked paprika
  • ½ tsp dried and crushed chillies
  • ½ tsp cumin
  • ½ tsp coriander
  • pepper
  • 400 grams beans, black or kidney
  • 125 grams corn
Enchiladas
  • 8 tortillas (corn or wheat)
  • 150 grams vegan cheese I love the Bute Island cheddar

Equipment

  • oven
  • Blender or hand mixer
  • Pan
  • Oven tray

Method
 

Roasted vegetables
  1. Preheat your oven to 200 °C (392 °F). Prepare an oven tray with some olive oil.
  2. Chop the onion, potato, sweet potato, the red pepper, the squash, and tear off the kale from the stem. Put everything in the oven tray with the garlic, the corn, the dried and crushed chilli flakes, salt, pepper, and granulated garlic. Put this in the oven to roast for about 30 minutes while we make the sauce.
The sauce
  1. Heat up olive oil in a pan. Chop the onion and garlic and add to the pan with some salt. Add the red pepper. Then add the ñora chillies and all the spices and let fry for a few minutes.
  2. Add the tinned tomatoes and let the sauce simmer for about 15 minutes. Blend the sauce before adding the beans and corn.
Enchiladas
  1. After 30 minutes, take the vegetables out of the oven. Keep the oven on 200 °C (392° F). Prepare your oven dish of choice for the enchiladas with some oil.
  2. To prepare the enchiladas, take a tortilla, cover with sauce, add a spoonful of roasted vegetables, roll it up, and place in the tray.
  3. Once you've done the 8 tortillas, cover it all with more sauce and cheese.
  4. Bake for about 25 minutes or until golden brown and bubbly on top.

Notes

This recipe can easily be made gluten free if you use corn tortillas! 
You can keep the enchiladas in the fridge up to 5 days and just reheat as you please.
Tried this recipe?Let us know how it was!

Filed Under: dinner, lunch, mexican, recipes

Minestrone with crispy chickpea croutons

11/10/2020 by Amber 4 Comments

Minestrone with crispy chickpea croutons. Sounds good right? This dish is perfect for the new season. Herby, hearty, filling, and great to make ahead of time!

from bottom to top: an oven tray with chickpeas, two bowls of minestrone, a small bowl of herbs, a spoon, and a tea towel against a dark backdrop

The perfect fall dish

Minestrone

For this minestrone we’re making the base (or the stock) ourselves. We’re using a few cheats to speed up the process, since making proper stock is best done over the course of a day. Or two! Typically, a minestrone is an Italian soup with a few common ingredients. Tomatoes, some seasonal vegetables, pasta or rice, beans. We’re going to use plenty of traditional ingredients. We will, however, also add a few not-so-traditional ones. This stock is definitely inspired by some of the cooking we did during my course at Hofmann Barcelona. (I did a course there in 2019, read more about me here if you like).

For this minestrone, we’re going to use kombu. Kombu is a Japanese kelp often used in broths. Feel free to read more about it here! It’s great in a broth or stock, it gives off a lot of flavour. We’re also using a tablespoon of marmite. Marmite is fantastic for its salty, umami flavours. Another layer of umami (we like umami!!) comes in the form of some sundried tomatoes. Make sure you get the ones in oil.

a bowl of minestrone being held on the left by a hand against a dark backdrop

This minestrone is the umami soup of your dreams.

Chickpea Croutons

Minestrone is often made with some type of bean. So, for this one we’re using chickpeas. But, we’re not just cooking them in with the soup. We’re going to roast these bad boys and sprinkle them on our soup. The key to getting the chickpeas nice and crispy is leaving them in the oven for long enough!! I’m going to give you instructions for time and temperature, but every oven is different. So keep an eye on them and leave them in for longer if you think it necessary. You’d rather leave them in a tad too long than too short.

an oven tray lined with parchment paper with a wooden spoon and oven roasted chickpea croutons

The crispy chickpea croutons really tie this dish together.

Ideally, I’d recommend starting this minestrone in the morning if you’re planning on having it in the evening. If that doesn’t work with your schedule, maybe prep the minestrone the night before. Why? Because broths and stocks  develop their flavours if they get a chance to cool down. The crispy chickpeas and the pasta you can make when you’re ready to serve.

Well, save this recipe for minestrone with crispy chickpea croutons, pin it to your Pinterest. Share it with friends and family. Make this today!

from bottom to top: an oven tray with chickpeas, two bowls of minestrone, a small bowl of herbs, a spoon, and a tea towel against a dark backdrop

Fall Minestrone with Crispy Chickpea Croutons

A seasonal Italian inspired dish with chickpea croutons and pasta. Hearty and delicious!
Print Recipe Pin Recipe
Prep Time 30 minutes mins
Cook Time 2 hours hrs
Cooling down 1 hour hr
Total Time 3 hours hrs 30 minutes mins
Servings: 6 people
Course: Dinner
Cuisine: Italian
Ingredients Equipment Method Notes

Ingredients
  

Minestrone
  • drizzle olive oil
  • 2 white onions, diced
  • 1 tsp salt
  • 3 cloves garlic, minced
  • 2 bell peppers, diced i used 1 yellow and 1 green pepper
  • 1 heaping tbsp marmite
  • 5 sundried tomatoes in oil, minced
  • 1 sweet potato, medium sized, in cubes
  • 4 potatoes, small, in cubes
  • pepper
  • 1 kombu leaf, cleaned
  • 4 bay leaves
  • 400 grams puréed tomatoes (passata) (1 large tin)
  • 1.5 liters filtered water
Chickpea Croutons
  • 200 grams chickpeas 1 small tin
  • drizzle of olive oil
  • pinch sea salt i like to use Maldon salt
  • cracked black pepper
  • 1 tsp paprika powder
  • ½ tsp crushed chilli flakes
  • 1 tsp oregano
  • 1 tsp thyme
  • 1 clove of garlic, crushed with the peel on
Optional
  • 400 grams pasta i used small elbow pasta

Equipment

  • oven
  • Big pot

Method
 

Minestrone
  1. Start with getting a big pot on the stove on a low to medium heat. Drizzle in a generous amount of olive oil. Once warm, add the onion, salt, and garlic. Sautée until softened.
  2. Add the peppers and turn up the heat a little. Once they're starting to cook down, add the marmite and the sundried tomatoes. I like adding some of the oil from the sundried tomatoes too.
  3. Throw in the sweet potato and potatoes, a bit of black pepper, the kombu leaf, the bay leaves, the puréed tomato, and the water.
  4. Stir well and let simmer for an hour. After an hour, you can take this off the heat. Let rest until you're read to serve the minestrone.
Crispy Chickpea Croutons
  1. Preheat your oven to 175/180 °C (350 °F). Line a baking tray or sheet with parchment paper.
  2. Rinse and dry your chickpeas. Once dry, add them to the baking tray. Drizzle with olive oil, add the salt, pepper, paprika, chillies, oregano, and thyme and move around so all the chickpeas are coated. Throw in the crushed garlic clove.
  3. Put in the oven for 30 minutes or until golden brown and crispy!
Pasta
  1. Choose your pasta and cook, following the instructions on the bag.
Back to the minestrone
  1. After the minestrone has had the chance to cool down, start warming it up whenever you're ready to serve. P.S. you can pick out the bay leaves and the kombu leaf before serving this.
  2. Serve the minestrone hot, topped with pasta and chickpeas.

Notes

This dish is easily made gluten free if you use GF pasta!
Keeps in the fridge for up to ca. 5 days. Freezes well too. 
Tried this recipe?Let us know how it was!

Filed Under: dinner, pasta, recipes, soups

onion bhaji burgers with mango

27/09/2020 by Amber 1 Comment

Onion bhaji burgers with mango and curry mayo. Honestly I love burgers. Vegan burgers are the best, there’s so many variations to play with.

two onion bhaji burgers and a chopped up lime against a dark background

Your new favourite burger!

A few weeks ago my partner was eating his Indian take-away. We have a lovely restaurant nearby called Koh-I-Noor, check it out if you’re ever in Barcelona. They’re so nice there and they have loads of vegan options. Anyway, being the good boyfriend he is, he shared his onion bhajis with me. As I’m eating them I’m thinking: “what if I make these into a burger?”. And thus the onion bhaji burger idea with mango and curry mayo was born. I’ll also share my burger bun recipe soon!

two onion bhaji burgers seen from the front with a few slices of lime and a hand grabbing the burger in the front on the right side

These bhaji burgers are irresistible!

Onion Bhajis

These onion bhaji burgers are based on a traditional Indian dish. Onion bhajis. They’re a typical Indian dish, usually served as a small snack. Depending on the region, the seasoning in these differs. But they all share a common base. Sliced onion tossed in chickpea flour with spices, fried in very hot oil. The crunchy texture combined with the spices go very well together with the fresh mango and curry mayo.

Curry Mayo

For the curry mayo, you can use any vegan mayo you want. All you need to do is add a spoonful of curry powder. I always buy all my spices at the local shops here. I usually go for a mildly spicy curry powder mix. There’s obviously many different types of mixes, feel free to dive in and read more here. What you could also do of course, is make my aioli recipe and add curry powder!

the onion bhaji burger with mango seen from close up. bread, curry mayo, lettuce, onion bhaji burger, tomato, onion, coriander and top bun with sesame seeds.

Close up

I absolutely adore these burgers. They’re quick, easy, and so so delicious! You can serve them with a nice salad or oven baked potatoes. Make sure you save this recipe; add a bookmark or pin it to a board on Pinterest!

Well, what are you waiting for? Make these today!

two onion bhaji burgers and a chopped up lime against a dark background

Onion bhaji burgers with mango

These onion bhaji burgers are delicious and quick! On the table in less than 30 minutes. Served with curry mayo and fresh mango.
Print Recipe Pin Recipe
Prep Time 10 minutes mins
Cook Time 10 minutes mins
resting time 10 minutes mins
Total Time 30 minutes mins
Servings: 2 people
Course: Dinner
Cuisine: Burgers, Indian
Ingredients Equipment Method

Ingredients
  

  • 2 burger buns
Bhaji Burgers
  • 1 large white onion, sliced
  • ½ tsp salt
  • ½ cup chickpea flour (besan)
  • handful fresh mint (finely diced)
  • pepper
  • ½ tsp turmeric
  • ½ tsp cumin
  • ½ tsp coriander
  • sunflower oil
Curry Mayo
  • 2 tbsp vegan mayonnaise
  • 1 tsp curry powder
Other ingredients
  • ½ mango, sliced
  • lettuce
  • fresh coriander
  • ½ red onion, sliced
  • ½ lime
  • ½ tomato, sliced

Equipment

  • Pan

Method
 

  1. Slice the white onion, add to a bowl, add the salt and leave to the side to rest.
  2. While the onion sits, prepare the other ingredients. Slice the mango, the red onion, the tomato, grab the burger buns and two plates. If you like your burger buns toasted, now is the time! Get the mayonnaise in a small bowl and stir in the curry powder.
  3. After 10 minutes, add the chickpea flour and the seasoning to the onion and mix well.
  4. Heat up the sunflower oil. Make sure the oil is very hot before adding the bhaji mix.
  5. With a big spoon, scoop the bhaji into the hot oil in the shape of a burger. With a spatula, flip them over after a few minutes.
  6. They're done when they're nice and golden brown.
  7. Get the buns ready, add the curry mayo, the lettuce, the bhaji burger, the mango, the tomato, the red onion, a bit of coriander, and dig in!
Tried this recipe?Let us know how it was!

Filed Under: dinner, recipes, Uncategorized

the best falafel EVER!

20/09/2020 by Amber 2 Comments

Here it is! The very best falafel ever. This recipe is straight forward and absolutely delicious. Restaurant quality falafel every single time.

pita with falafel held by hand with sour cream, tomato cubes, cucumber, parsley with more falafel in the background and a bowl of red onion against a dark backdrop

Serve the best falafel ever with your favourite toppings!

Soak your chickpeas!

The most important element of this recipe is the chickpeas. Only with dried and soaked chickpeas will this work. Trust me, back in the day I tried to make falafel with cooked chickpeas, and let’s just say it didn’t work. Soak them for at least 12 hours. I always get them ready to soak just before I go to bed. Make sure they’re covered with plenty of water as they’ll soak up a lot of it. I also recommend adding a teaspoon of baking soda. The baking soda helps soften them as they soak. I use the same trick when I soak chickpeas every single time. Read more about soaking legumes in this great Guardian article.

food processor filled with soaked chickpeas, onion, garlic, spices, coriander, and parsley.

Pop all the ingredients in a food processor

Mix and rest

Another important part of this falafel recipe is letting the mixture cool and rest. After you’ve mixed all of the ingredients together in your food processor, transfer them to a bowl. This is when you add the last two ingredients and cover. Ideally you’d let this sit in the fridge for at least an hour. The resting time lets the mixture fully combine and absorb.

Also, the falafels fry beautifully when rolled from the fridge. The hot oil + chilled falafel = pure delight.

falafel mix after mixing in the food processor, consistency like coarse sand in the food processor

Make sure the mix is a coarse sand-like consistency.

Lastly, make sure your oil is HOT. When testing this recipe there were a few times when I prematurely fried. The falafels crack open and look a bit sad. Of course, they still taste great. But hey, eating is done with the eyes and the mouth.

I love having this in a warm, pillowy pita or flatbread. A bit of aioli (I know, not traditional! But delicious!), mixed greens, tomato and cucumber with a splash of lime juice, fresh parsley, a pickled red onion, and sour cream. Also fabulous with a drizzle of tahini, a dollop of vegan yoghurt, or a generous spoonful of hummus.

three pita's with falafel and topping on wooden board. a bunch of fresh parsley to the left, two small bowls with cucumber and tomato, and pickled red onion. against a dark backdrop

The falafel ready to eat!

pita with falafel held by hand with sour cream, tomato cubes, cucumber, parsley with more falafel in the background and a bowl of red onion against a dark backdrop

the best falafel EVER!

This falafel recipe gets you those authentic, restaurant quality falafels every. single. time.
Print Recipe Pin Recipe
Prep Time 25 minutes mins
Cook Time 20 minutes mins
soaking and resting time 14 hours hrs
Total Time 14 hours hrs 45 minutes mins
Servings: 4 people
Course: Dinner, Lunch
Cuisine: Lebanese, Middle Eastern
Ingredients Equipment Method Notes

Ingredients
  

  • 200 g dried chickpeas
  • 1 tsp baking soda
  • ½ white onion
  • 1 clove garlic
  • pinch salt
  • pepper
  • 1 tsp cumin
  • 1 tsp coriander (dried)
  • handful fresh coriander
  • handful fresh parsley
  • 1 tsp baking soda
  • 2 tbsp chickpea flour
  • olive oil (depends on size of your pot)*

Equipment

  • Food Processor

Method
 

  1. The day before you're planning to make the falafels, soak the chickpeas in a bowl with plenty of water and the baking soda.
  2. The following day, rinse the chickpeas and put them in the food processor.
  3. Add the half onion, the garlic, salt, pepper, cumin, coriander, and the fresh coriander and parsley.
  4. Pulse the mixture, scraping down the sides occasionally. It's done when it has the consistency of coarse sand.
  5. Transfer the mixture to a bowl, add the baking soda and chickpea flour, cover with foil, and place in the fridge for at least 30 minutes. Preferably leave it to rest in the fridge for an hour or two hours.
  6. Then, take the falafel mix from the fridge and roll into balls.
  7. Heat up the olive oil in a pot or pan. Make sure there's enough oil to fry the falafels. If you want to use less oil, you can also use less and just turn the falafels halfway through.
    They should be done in about 4-5 minutes, or when golden brown on the outside.
  8. Serve in a pita or flatbread with fresh veggies, hummus, sour cream, and your favourite toppings!

Notes

*feel free to use any other type of oil you prefer. 
You can also shape these into patties and make falafel burgers. Yum! 
You can keep the mixture in the fridge up to 5 days and make some falafels whenever you fancy!
I don't recommend making them and storing them, they go very dry. 
Tried this recipe?Let us know how it was!

Filed Under: dinner, recipes, Uncategorized

No Bake Lime Cheesecake

13/09/2020 by Amber 1 Comment

This no bake lime cheesecake is pure velvety, refreshing goodness. Zesty lime, creamy cashew cream (from scratch!), sweet crumbly biscuit base. And better yet: no oven needed!

no bake lime cheesecake seen from above with a slice cut from the lower side against a dark backdrop

Creamy and refreshing lime cheesecake

Biscuit Base

I love using oatmeal digestive cookies for the base. Like these. They’re similar to graham crackers. You can easily make this recipe gluten free by opting for some GF biscuits! It’s best to choose a simple biscuit as a base. That way you’re not overpowering any of the other flavours. For this no bake lime cheesecake, we’re taking some of the cookies and grinding them up with some vegan butter. You can use a food processor or the attachment on an immersion blender.

For this no bake version, all there is to it, is putting the base in the freezer for about 10 minutes.

front view of no bake lime cheesecake with a slice balancing on serving knife against a dark backdrop with two forks in the background

Serve the no bake lime cheesecake for brunch!

Cashew Cream

There’s no problem with using store bought cream cheese. But I prefer making my own for a cheesecake. It’s fairly simple, you only a need few ingredients. All it takes is a little preparation. Just like my recipe for vegan sour cream (like I use for my 15 minute tacos) you’ll need to soak the cashews. It’s best to let them soak overnight. However, if you’re in a pinch you can also soak them for an hour or two in hot water. Or you could even boil them until they’ve softened.

Very important when making your own cream from cashews is to blend them well. If you have a powerful blender, make sure you blend them for a few minutes. This will also work in a food processor or with an immersion blender.

Limes

The lime in this cake makes for a lovely refreshing, zesty cake. A bit of lime zest in the cashew cream is a nice touch. I  recommend making sure you clean the limes properly. And if you can, buy organic limes. As a rule, it’s always good to clean fruits and vegetables very well when using the skin or zest.

I really like the idea of serving this at a brunch. It looks beautiful with the slices of lime on top. I have yet to find someone who doesn’t like a) limes and b) a cheesecake!

Make this lime cheesecake today!

no bake lime cheesecake seen from above with slice on the top right side being served. against a dark backdrop

no bake lime cheesecake

this no bake lime cheesecake is perfect for a late summer brunch. zesty, creamy, and just all-round delicious. I used a relative small cake tin, so make sure to measure yours and adjust the quantities as needed!
Print Recipe Pin Recipe
Prep Time 20 minutes mins
Cook Time 10 minutes mins
soaking and resting time 12 hours hrs
Total Time 12 hours hrs 30 minutes mins
Servings: 12 slices
Course: Dessert
Ingredients Equipment Method Notes

Ingredients
  

Biscuit Base
  • 10 oatmeal digestive cookies or ±155 grams
  • 1 heaping tbsp margarine (or vegan butter or coconut oil) or 40 grams
Lime Cashew Cream
  • 370 g soaked cashews or 2.5 cups
  • 85 g water or ½ cup
  • pinch of salt
  • 2 tbsp agave syrup
  • 2 tbsp coconut oil
  • 2 juice of 2 limes
  • 1 zest of 1 lime
Topping
  • 1 lime, sliced

Equipment

  • cake tin (18CM Ø or 7⅛ Ø inches)
  • food processor or blender
  • freezer

Method
 

  1. soak the cashews.
  2. line a cake tin with parchment paper and a bit of coconut oil or margarine. i used a relatively small one; 18CM Ø (7⅛inches).
  3. start by grinding up the oatmeal digestive cookies. once they're looking more like crumbs, add the margarine or vegan butter, and blitz some more to incorporate.
  4. place the base in the freezer for at least 10 minutes.
  5. while the base sits in the freezer, proceed by making the cashew cream filling.
  6. to a food processor, add the soaked cashews, the water, the pinch of salt, the agave, the coconut oil, and the juice of 2 limes. blend this for 3 to 5 minutes depending on the strength of your processor or blender. make sure you scrape down the sides as needed and check the taste. add the zest of 1 lime at the end.
  7. take the base out of the freezer and pour the lime cashew cream on top. slice the last lime and place the slices decoratively on top of the cake. let this rest in the freezer for about 2 hours.
  8. transfer the cheesecake to the fridge at least 30 minutes/an hour before serving.
  9. the cake should keep in the fridge for up to 5 days.

Notes

You can make the cashew cream with an immersion blender or a blender. 
Agave syrup can be substituted for any other sweetener of choice.
You can make this cheesecake gluten free by using GF biscuits for the base!
Tried this recipe?Let us know how it was!

Filed Under: dessert, recipes, Uncategorized

  • « Go to Previous Page
  • Page 1
  • Page 2
  • Page 3
  • Page 4
  • Go to Next Page »

Primary Sidebar

  • Facebook
  • Instagram
  • LinkedIn
  • Pinterest
  • Tumblr
  • Twitter

Newsletter

Sign up for the newsletter to stay up to date with me, get the latest recipes straight to your inbox, hear about events, cooking classes, videos, and more! Talk soon 🫶

Archives

recipe archives

  • December 2023
  • November 2023
  • January 2023
  • September 2022
  • February 2022
  • January 2022
  • January 2021
  • December 2020
  • November 2020
  • October 2020
  • September 2020
  • August 2020

Categories

outrageously delicious recipes

caramelising onions with spices in pan with wooden spoon

15 minute caramelised onion curry

close up of one brioche bun in hand

the best vegan brioche buns

zoomed in photo of cookie dough before baking

spiced choc chip cookies

cast iron skillet seen from top down with spicy curried butter beans against white tablecloth backdrop

Spicy Curried Butter Beans

VEGANUARY

a cream white bowl of the creamy basil pasta seen from front view with a spoon and fork in the back

Pasta with Creamy Vegan Basil Sauce

Vegan Apple Crumble with Oats

Vegan Mushroom Tomato Ragú

MORE DELICIOUS RECIPES

Tofu Bowl with Sesame Vinaigrette

20/01/2021 By Amber Leave a Comment

two tofu bowls with sesame vinaigrette seen from a front view with half an avocado, a halved lime, spring onion, a skillet with tofu, and a book in the background

...

Read More

Vegan Tofu & Shiitake Gyros

19/01/2021 By Amber 1 Comment

three vegan tofu and shiitake gyros seen from above with a hand grabbing one.

...

Read More

Copyright © 2025 amberitas kitchen on the Foodie Pro Theme